Grade 6-8 hands-on curriculum
Compiled by Dan Harper, v. 0.5
This curriculum refers to the participants as “teens”
Copyright (c) 2014-2024 Dan Harper
Back to the main Ecojustice page
The session plans for southern New England are adapted for the weather of this region. Weather is variable in southern New England — and getting increasingly variable with accelerating climate change — so there are plenty of indoors activities. I suggest that for any given week, you have a plan in place for both an indoors activity and an outdoors activity. If the weather’s good, do the outdoors activity while you can!
Contents
Multiple sessions (activities which may last for more than one week)
Supplemental session plans (additional projects)
Games (useful if you get stuck indoors unexpectedly)
Many of the session plans on this page are based on material in the Ecojustice Outdoors Book (Fifth Edition). Copies of this book may be obtained by contacting the curriculum author. However, note that this book was written specifically for southern New England. In addition to outdoors activities, the Ecojustice Outdoors Book has sections on Ecojustice Elders, information on threats to Earth’s life-supporting systems, and other material about the justice side of ecojustice.
Every session should include something about justice! At a minimum, you should read an ecojustice poem at the start of every class (see Standard Class Lesson Plan below). More information about ecojustice poetry may be obtained from the curriculum author.
Relate each session to one of the Ecojustice Elders. For example, maybe you could relate Session 1: Solar Cooking to Wangari Maathai’s justice work. Maathai was concerned about how women are affected by ecological problems. In many parts of the world, cooking remains the primary responsibility of women. In some cultures, giving women access to solar cookers might help them lower their dependence on burning wood for cooking. This could mean less work for women, plus less exposure to smoke for women, plus less demand for cutting down trees. Many of the sessions have suggestions for a relevant Ecojustice Elder.
You can also ask the teens to help make connections between a lesson and one of the Ecojustice Elders. If you’re doing gardening — hey, didn’t Henry Thoreau keep a garden? Or maybe instead you’d say — what about Cesar Chavez, who worked with farmworkers?
Planning ahead
The planning schedule below is for the standard lesson plans only. Major projects require different planning. Also, there are “floating” session plans (labeled “Autumn/1, Spring/2, etc.) for each season which can be substituted in for any other session plan.
REMEMBER: Some of these activities require you to be outdoors. Depending on the weather, you may have to switch indoor activities for outdoor activities. Check weather forecasts.
REMEMBER: RESERVE YOUR CAMPSITE for the spring camping trip. several months in advance. Do not wait until the campsites are all filled up.
September/1 (outdoors) — plan 1 week ahead — Get food, and materials for solar oven
September/2 (indoors or outdoors) — plan the day before — Get the office supplies needed
September/3 (indoors or outdoors) — plan the day before — Get the crayons ready
OR
plan 3 weeks in advance — if you plan to use the woodless pencils, or the Sunprints, you will need to order them in advance
October/1 (outdoors) — plan the day before — photocopy the handout
October/2 (outdoors, can be indoors if necessary) — plan 1 week ahead — get food, get camp stove, get propane
October/3 (outdoors) — plan 2 weeks ahead — notify parents about field trip, have DRE take care of safety stuff (permission forms, etc.)
November/1 (outdoors) — plan 1 week ahead — arrange for firepit, make sure you have wood
November/2 (indoors or outdoors) — plan the day before — make sure you know the rules, get blindfolds and foam balls
December/1 (indoors) — plan one month in advance — arrange for teens to prepare social hour, get food
January/1 (indoors) — plan 2-3 weeks in advance — ask parents if teens have their own pocket knife, borrow enough knives for those who don’t; gather wood that’s good to carve (green wood is easiest!)
January/2 (indoors) — plan 1 week ahead — get cotton rope, prepare handouts
January/3 (indoors/outdoors) — plan 2 weeks in advance — gather the equipment and materials you’ll need (find out if you can borrow this from someone!)
February/1 (indoors) — plan 1-3 weeks in advance — if you already have a go-bag, then this is an easy session to lead. If you don’t already have a go-bag (and you should, so just do it!), you’ll have to put one together; either that, or find someone in the congregation you has a go bag, and have them come visit the class.
February/2 (indoors) — plan the day before — make sure you have poster-making supplies
February/3 (mostly indoors) — plan the day before — make sure you know where the teens’ field notebooks are (and make new ones if they’re lost)
March/1 (outdoors) — plan 2 weeks ahead — notify parents about field trip, have DRE take care of safety stuff (permission forms, etc.)
March/2 (indoors) — plan 1 week in advance — get seeds, potting soil, peat pots
March/3 (indoors) — plan 1-2 weeks in advance — If you already know how to dye, you’ll only need a week to gather the materials; if you’ve never done dyeing before, find someone who can help you!
March/4 — planning varies, depnding on which activity you decide to repeat
April/1 — plan 1 week in advance gather the materials needed
The rest of April, and May/1 — is devoted to the overnight camping trip! You should start planning the camping trip no later than beginning the first Sunday in April. Start talking with the teens about it. Notify parents. Figure out logistics (tents, drivers, location, etc.) Reserve your campsite well in advance!
May/2 — plan 1 week in advance — you’ll need paper, tape, mallet/shammers, etc.
Standard Class Session Plan
Light chalice: 2 min.
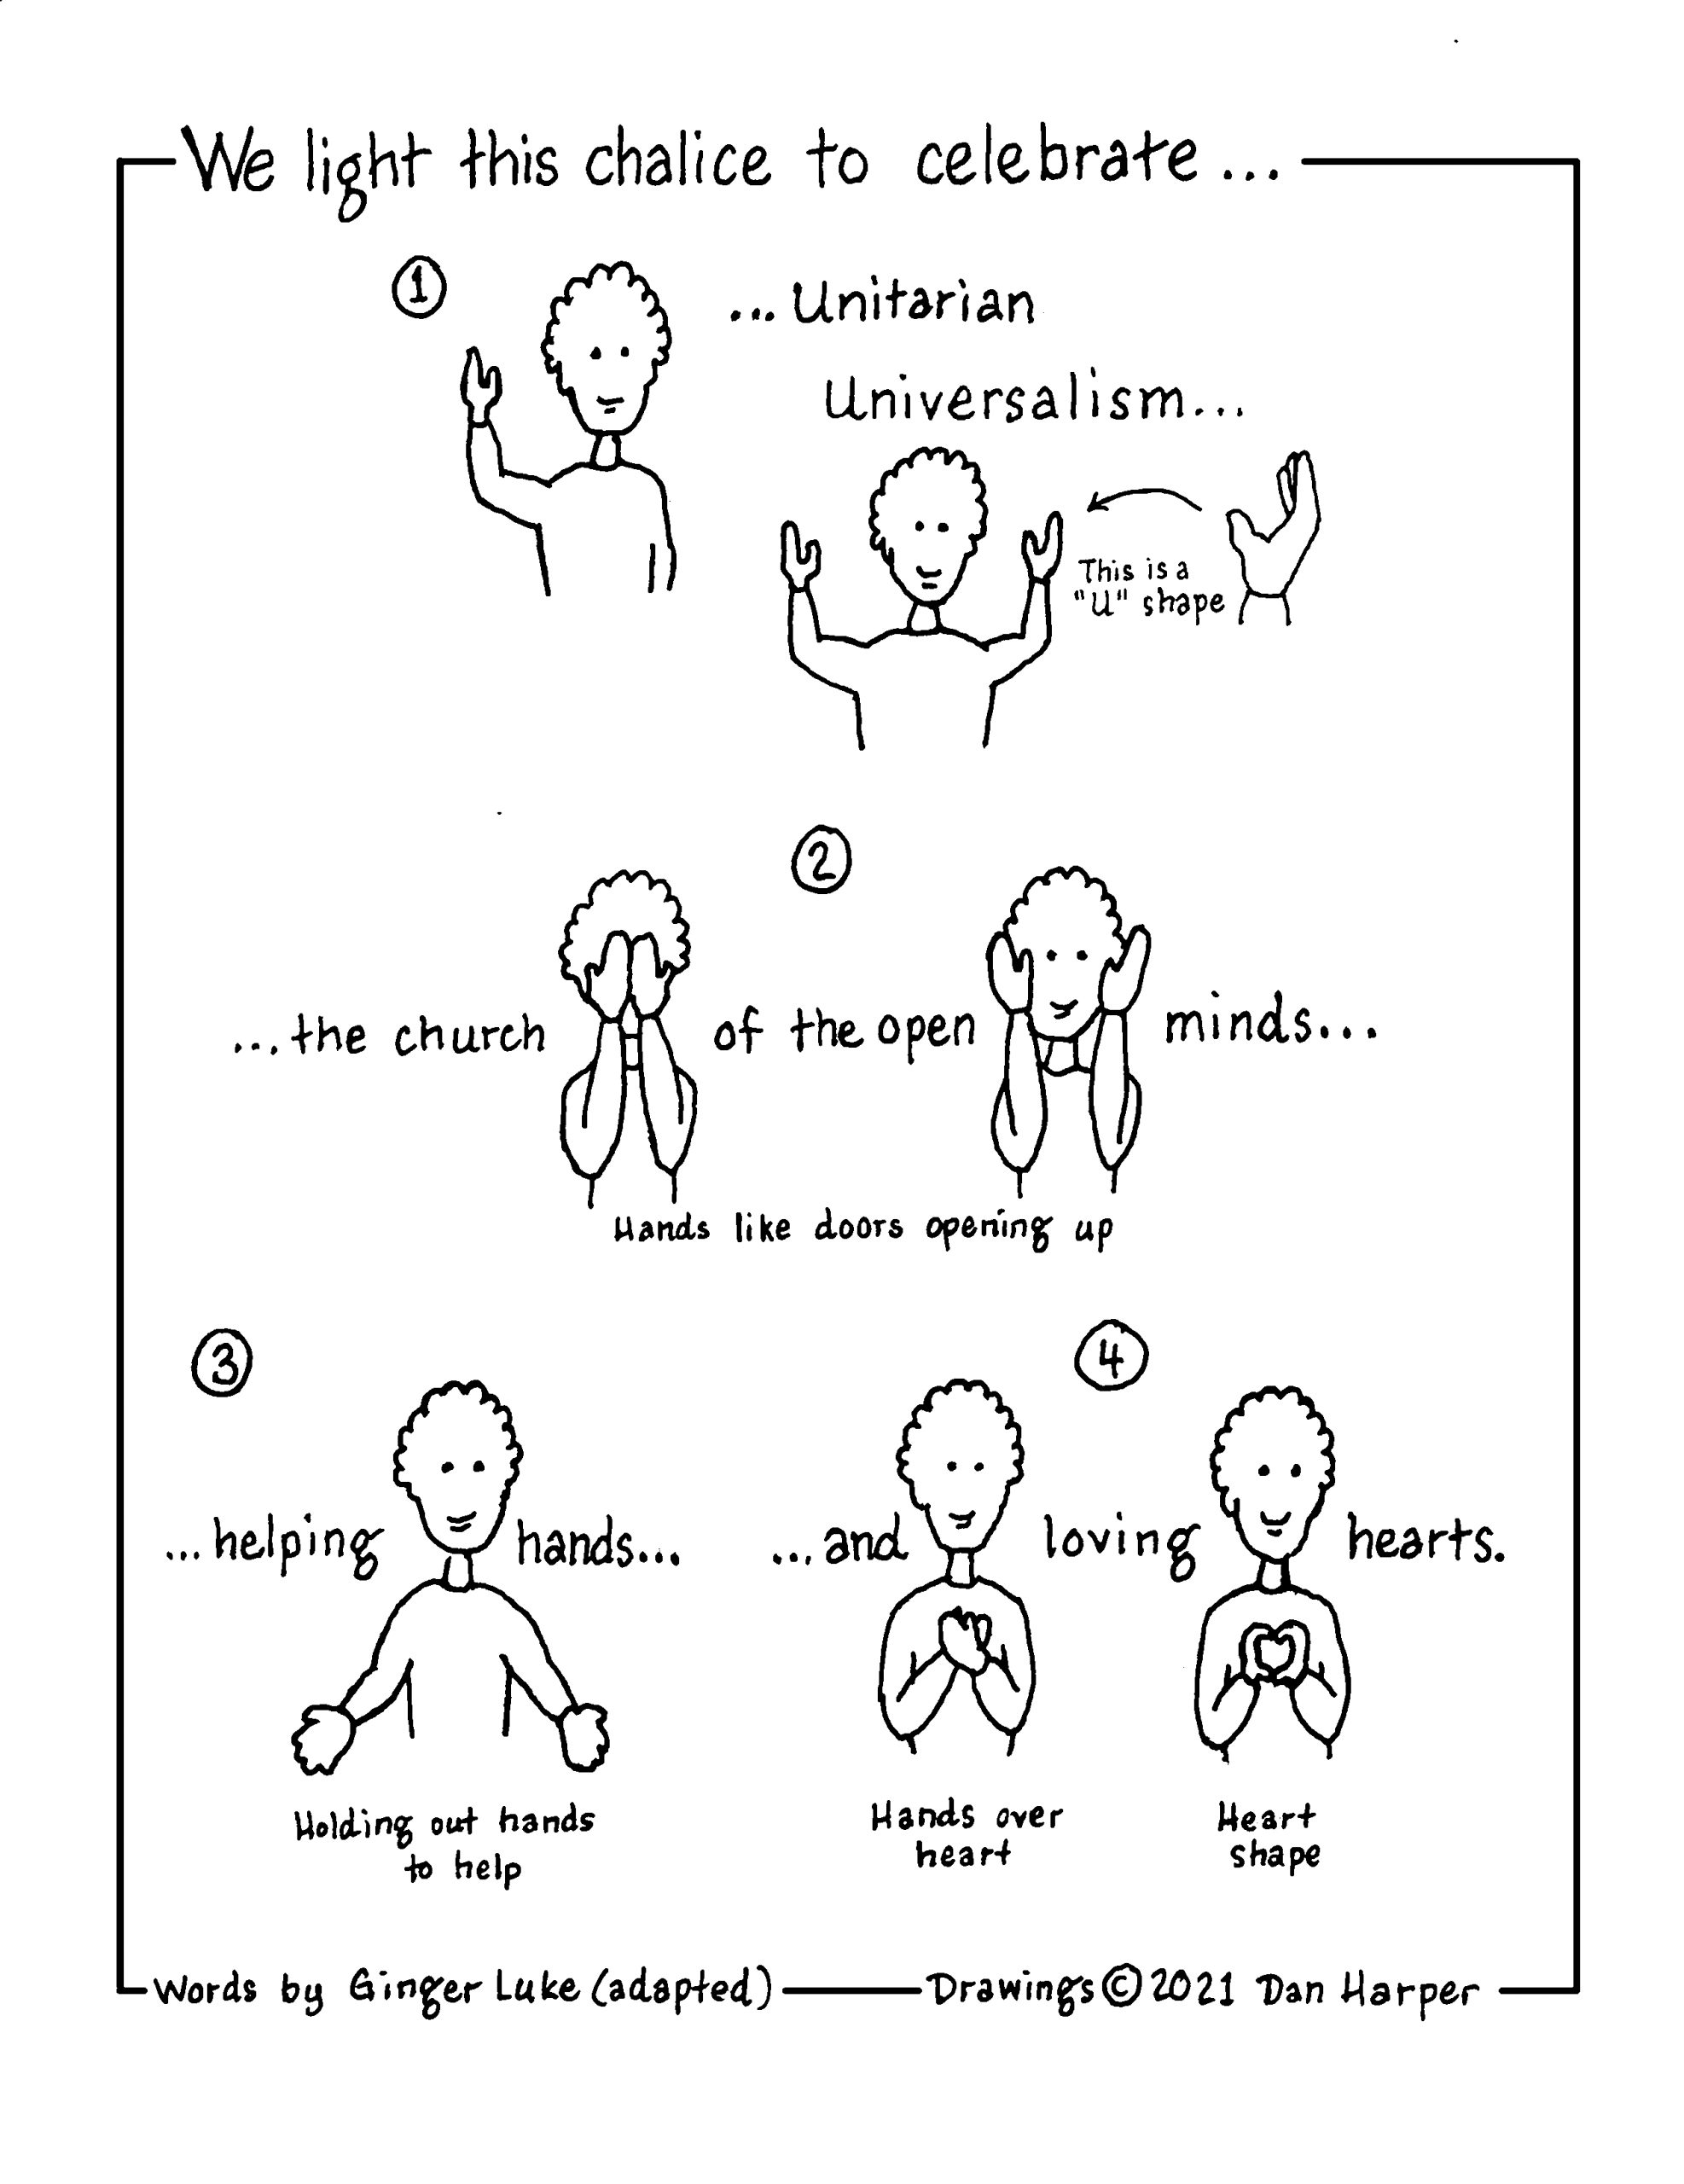
You could use these chalice lighting words (and movements), or whatever else you like:
We light this chalice to celebrate
Unitarian Universalism
The church of the open mind,
Helping hands,
And loving hearts.
Reading: 3 min.
Read an ecojustice poem of your choice. One good source for ecojustice poetry is: Ghost Fishing: An Ecojustice Poetry Anthology.(Univ. of Georgia Press, 2018), ed. Melissa Tucker. See also the Jan., 2016, issue of Poetry magazine. It often helps if you read the poem twice.
Check-in: 5-10 min.
Go around the circle, everyone can say a good thing and a bad thing that happened in the past week (or two good things, or two bad things).
Ecojustice Elder: 5 min.
Talk about one of the Ecojustice Elders. Explain how they relate to today’s main activity.
Main Activity: 30-45 min.
Do the main activity for the class, as outlined below.
Clean-up & Closing Benediction: 5-10 min.
Be sure to allow time for clean-up before the end of class. This is especially important for some sessions, e.g., cooking.
When clean-up is complete, say the unison closing words together:
Go out into the world in peace,
Be of good courage,
Hold fast to what is good,
Return to no one evil for evil.
Strengthen the faint-hearted,
Help the suffering;
Be patient with all,
Love all living beings.
Autumn Session Plans
September/1: Solar cooking (outdoors)
Do this session as early as possible in the school year, before the sun gets too low in the sky.
Materials:
Commercial solar over (optional)
large size pizza boxes for every teen, or any cardboard box about 16 inches square, and 2-4 inches deep
Several feet of aluminum foil
black construction paper
clear plastic oven wrap
masking tape
black water-based nontoxic poster paint
2 feet of string
clear plastic tape
Note: Avoid materials that you think might become toxic when heated.
Tools needed:
scissors (teachers may also want to have a knife on hand to cut cardboard). ruler
marker
paint brushes, can of water
Prep:
We recommend you make one of the solar ovens yourself before trying it in class.
Session plan:
See the Standard Lesson Plan for the opening, and the closing.
Suggest reading: from the book Koviashuvik (KOH-vee-AH-shoe-vick) by Sam Wright. Sam and Billie Wright lived in the wilderness in Alaska for nineteen years. This is taken from Sam’s book about their life there.
“When I take our winter meat, I actually kill a caribou or moose. Yes, I kill a moose and butcher it. I transform it into winter meat.
“With words we transform killing into taking, and butchering into preparing. We take our winter meat without reference to specific game, such as caribou or Dali sheep. Even the word, game, transforms the act. I do not see our activity as sport. It is not a game. Sport implies an element of play. Hunting for us is not sport.
“Even the word, hunting, which once had worthy antecedents and still has positive values, has been transformed into fair-chase. Costumed people on horses, following a pack of dogs, after a terrified fox released from a cage is called hunting. There is no fair-chase today. Even in Alaska, where I am a hunter, there is no fair-chase; although there are still positive values in the hunting syndrome, it is not fair-chase.
“I hunt, kill and butcher our caribou or moose with a quality of excitement and awe because this is the way we lived for millions of years. Physically and psychologically and socially I am a hunter. We are all hunters, even though we have transformed hunting into a sport. Transformed it into games like football, business and war.
“At Koviashuvik we have transformed football into wood cutting, and business into food gathering and hunting. We would transform war if we could. Yes we would.”
— from Koviashuvik: A Time and Place of Joy by Sam Wright (Sierra Club Books, 1988).
REMINDER: This class should be done before the autumnal equinox. You want the sun to be fairly high in the sky, and outdoor temperatures need to be fairly warm.
You can use a commercial solar oven to make solar s’mores. And/or use the PDF below to make your own cardboard box solar oven.

September/2: Field Notebooks (indoors or outdoors)
N.B.: If the weather is bad, bring some natural objects inddors, so the teens can make practice entires in their field notebooks.
Ecojustice Elder:
Henry Thoreau was known for his journals, a careful record of the time he spent in Nature.
Materials:
Material to make field notebooks for everyone:
8-1/2 x 11 inch recycled plain paper, 12 sheets per person
8-1/2 x 11 inch cardstock, 1 sheet per person
pens or pencils for each person
Tools:
Saddle stich stapler
Rulers
Prep:
Set up tools and materials
Session Plan:
See the Standard Lesson Plan for the opening, and the closing.
Suggested reading:
“Do a little more of that work which you have sometime confessed to be good, which you feel that society and your justest judge rightly demands of you. Do what you reprove yourself for not doing. Know that you are neither satisfied nor dissatisfied with yourself without reason. Let me say to you and to myself in one breath, Cultivate the tree which you have found to bear fruit in your soil.”
— Henry Thoreau, Journal, July 16, 1851.
A. Introducing field notebooks
Tell the teens that there are three main purposes for a field notebook — citizen scientists, naturalists, or outdoor sports enthusiasts. We’ll mostly focus on nature observations in Ecojustice Class.
Naturalists and field notebooks
Naturalists (that’s Ecojustice Class) enjoy being outdoors. They might use their field notebooks to record scientific data. But they also observe things they’re interested in. They might even write poetry or draw pictures in their field notebooks.
Many naturalists are also citizen scientists and outdoor sports enthusiasts. So let’s find out about the other uses of field notebooks.
Citizen Scientists and field notebooks
Reading from Daniel Shaw, Eco-tracking: On the Trail of Habitat Change (University of New Mexico Press, 2010) Here’s what citizen scientists do with their field notebooks:
“Each time you write in your field notebook, it’s called making an entry. Each entry should start with the date, time of day, location, and summary about the weather [and tide if near ocean]. What makes up the rest of the entry depends on what is being examined.
“The more detail you add to your notes, the better. However, what you put in your notebook should be true and free of prejudice. Or, as scientists say, it should be accurate and as bias free as possible. Be precise. If you see a flock of geese, try and count them to record, 12 geese; if you only have a chance to count 10 geese [before they fly away] but you know there were more, write, at least 10 geese. The details, precision, and accuracy of your notes help you make scientific comparisons and observations through a strong field notebook.
“Words and numbers are just the start of a good field journal. Sketches and diagrams enhance your recorded information. It might be far easier and quicker to show the pattern on a turtle’s shell with a sketch than to do it using only words. A field notebook is not so much about the art [so you don’t have to be a good artist] as it is about the information. … Journals can also be a great place to tape in a leaf or other piece of nature to help you explain or remember your nature observation.”
Outdoor sports enthusiasts and field notebooks
Outdoors sports enthusiasts might use their field notebooks for a variety of things:
— to record their training, and record any significant achievements. Outdoors Sports includes things like hiking, backpacking, canoeing and kayaking, fishing, rock climbing, orienteering, and so on.
— people who go fishing (called anglers) sometimes write down details about every trip they make: time, date, location, and weather; water conditions; companions; invertebrates and other fish food they observe; size of fish caught and released (if any).
— Hikers might record their accomplishments. When I was working on climbing all the 4,000 footers in the White Mountains of New Hampshire, I kept field notes in which I recorded date and weather; hiking companions; which peaks I climbed that day; anything unique or unusual about the hike.
B. Make field notebooks (5 minutes):
Fold paper in half, staple with the saddle stitcher.
C. Decorate field notebooks (5-15 min.)
Have the teens start decorating them if they want. At least, all campers should write their names on the covers.
Things you might want to add to your field notebook:
Paste a ruler on the back cover
Include a Beaufort wind scale

D. Practice entry (10 min.)
Have your campers make a practice entry in their field notebook. Sit around a plant and have everyone practice making an entry, as described in the handout below.
Handout: How to keep a field notebook
Every entry in your field notebook should have:
— Date and time
— Weather (clouds/sun, wind, temperature, whatever you can write down)
— Where you are, and what kind of plants (swamp, forest, field, etc.)
Naturalists usually make two different kinds of entries in their field notebooks:
— Journal entry: write down what you see and hear and sense. You should also write down what you are thinking and feeling.
— Observations: You can make lists different animals or plants you saw. Or you can write and draw a detailed description of something.
NOTE! One of the main purposes that people use field notebooks is that it’s a way to sit still (not moving much, not making sound). When you sit still, you’re more likely to see birds and animals!
Noe here are some things to try with your field notebook….
Option 1: Field notebook scavenger hunt
Describe three different plants in your field notebook. Here are some things you might describe:
— What shape are the leaves of your plant? Trace a leaf in your field notebook. (But if the plant is Poison Oak, you should not try to trace the leaves!) Then write down what color the leaf is, whether it is flat or curved, and anything else you see.
— How big is the plant? If it’s a really big plant like a tree, you may have to guess how big it is.
— Do you see any flowers or seeds on the plant?
— Can you find any animals living on or near the plant?
[This is based, in part, on a lesson plan from the University of California Natural Reserve System titled “Field Note Scavenger Hunt,” by Jim Johnson (http://nrs.ucop.edu/host/curricula/fieldnotes.html accessed 10 March 2015)
Option 2: Field notebook journal exercise:
Sit outdoors, somewhere where you are far enough from other humans that you can’t talk to them.
Start an entry in your field notebook. This is going to be a journal entry. Write down:
— Three non-human sounds that you can hear from wherever you are sitting. If you can, tell what kind of creature made each sound.
— Three non-human things you can smell
— Write down what you feel like while you are sitting there
E. Sharing
Come together before the end of class.
What was it like putting stuff in your field notebook? Frustrating? Fun? Did it make you look more closely at the natural world?
Did your field notebook help you sit still? If you sat still, did you see any birds or other animals?
September/3: Leaves and your field notebook (indoors or outdoors)
Ecojustice Elder
Session Plan:
See the Standard Lesson Plan for the opening, and the closing.
Suggested reading: The Tree Agreement by Elise Paschen.
In this session, you’ll add to your field notebook:
— rubbings of leaves you find outdoors
— tracings of leaves you find outdoors
— make cyanotypes (Sunprints) of leaves
Have at least one copy of a tree field guide, to help identify leaves. We prefer the Peterson Field Guide to Eastern Trees (often on sale direct from the publisher’s website), as it has excellent drawings of tree leaf outlines to help inspire your leaf tracings.
Materials needed for rubbings:
— Crayons, and/or Koh-i-noor “Progresso” woodless colored pencils (buy open stock, in the colors you want, direct from the Koh-i-noor website)
— paper, either the paper in the field notebooks, or thin sumi-e paper cut to the same size as the filed notebook (do the rubbings on the sumi-e paper then glue them into the field notebook)
Materials needed for tracing leaves:
— pencils
— field notebooks
Materials needed for Sunprints:
— Sunprint kits from Lawrence Hall of Science
— something like clean plastic dishpans to hold the water to develop the prints in
— a place to let the Sunprints dry
How to trace leaves
First you’ll want to know something about the tree. If this is a tree with compound leaves, make sure you get the whole leaf to trace, not just a leaflet.
Get a leaf from the tree. Place it on a page in your field notebook, and hold it down carefully. Trace around the edges with a sharp pencil. Be careful to get important details of the leaf shape, such as toothed edges.
The place the leaf to one side, and draw in the major veins of the leaf.
When done, write the name of the tree on the page with your tracing. If you’re brave, also write the Latin (scientific) name.
How to do leaf rubbings
Place the leaf vein side up under a sheet of paper (or under a page in your field notebook. Make sure you put the veins up! (N.B.: This activity works best for tree leaves; with other plants, the leaves tend to be softer, and may mush under the pressure of rubbing.)
Start by rubbing gently, using a broad part of the crayon or pencil (i.e., not the point). Rub gently and find the major veins. Then go around the edges of the leaf, trying to capture all the details of the leaf edge. Finally, work into the middle of the leaf, capturing as many veins as possible. — Or just rub away, and see what happens!
How to make Sunprints
Follow the instructions on the package.
You will need a day when it’s not raining outside, and the sky is either sunny or fairly bright. If it’s cloudy, exposure times will be longer.
The smaller Sunprint paper is 4 inches square, and is significantly less expensive than the larger (8-1/2 x 11) paper. Most tree leaves are too big for 4 inch square paper, so you might save Sunprints for leaves of smaller plants.
October/1: Trail Signs (outdoors)
Ecojustice Elder:
Prep:
Using the handout below, set up a trail around your campus. If you have a small church campus, then set up a trail in a nearby park, or on safe city streets. Depending on how many teachers and how many teens you have, you may want to split the class into two or more groups. If so, you may want to set up more than one trail — or plan to send multiple groups out on your trail at staggered intervals.
Session Plan:
See the Standard Lesson Plan for the opening, and the closing.
Suggested reading: “Global Warming Blues” by Mariahdessa Ekere Tallie
Show the teens the handout. Show them the starting point for the trail you’ve set up. Accompany them as they follow your trail, giving hints only as needed.
Now that they understand how trail signs work, have each group make their own trail. Then trade off, so different groups follow each other’s trails.

October/2: Cook Scrambled Eggs on a Camp Stove (outdoors)
If it’s raining, you can do this activity under a canopy. The teens can help set up a 10 x 10 foot canopy with you!
Ecojustice Elder:
Henry Thoreau liked to cook outdoors when he lived at Walden Pond.
OR
Harriet Tubman had to cook outdoors when helping people escape from slavery.
Materials:
Eggs (2 for every teen, plus some for mistakes)
Butter
Salt
Tools:
Camp stoves, 1 per teacher works best
Extra propane (trust us, you don’t want to run out of propane in the middle of a class)
For cooking:
Frying pans
Spatulas
Mixing bowls
Whisk to beat eggs
Oven mitts
Matches
Forks and plates to eat from
For clean-up:
Three tubs, one with warm soapy water, one with warm rinse water, one for cleaned dishes
Sponges or dish rags
Steel wool
etc.
Prep:
Make sure you know how to operate the stove yourself. If you’ve never cooked on a camp stove before, you should probably learn how before teaching the teens….
Session Plan:
See the Standard Lesson Plan for the opening, and the closing.
Suggested reading: “mulberry fields” by Lucille Clifton
Cooking on a camp stove is a favorite activity in Ecojustice Camp and Ecojustice Class. The following excerpt from the Ecojustice Outdoors Book outlines some of the different kinds of camp stoves you can use:

The easiest plan is to use a propane camp stove, such as a Coleman two-burner propane stove. Two-burner stoves are more stable than smaller backpacking stoves, and therefore safer.
When we cook on two-burner camp stoves, we set up three stations.
Station 1 has the camp stove, eggs, bowl to break eggs into, salt, butter, a whisk or fork to beat the eggs, frying pan, spatula, ovens mitts, matches. More mature teens should learn how to safely light the stove, and adjust the flame height. For less mature teens, teachers will want to take care of these things.
Station 2 is where you can eat your eggs. Forks and napkins are at this station.
Station 3 is the dishwashing station. We put out a tub of very warm (not hot) soapy water and cleaning implements. Next is a tub of very warm (not hot) rinse water. Then a clean tray in which to place cleaned dishes. Washing the dishes is often the most popular part of the activity (it’s kinda like water play for teens). N.B.: Your city/town health department will probably require you to sanitize the dishes anyway, but it’s good to get the teens in the habit of cleaning up.
October/3: Field Trip
Ecojustice Elder:
Harriet Tubman used her skills as a naturalist to help people escape from slavery.
Prep:
Arrange transportation to the field trip site.
Visit the field trip site yourself. What will interest active teens? (Hint: You may decided to just let them explore.)
Session Plan:
See the Standard Lesson Plan for the opening, and the closing. (You can do the opening and closing at the field trip site, or before and after driving there and back — your choice.)
Suggested reading:
May the earth continue to live
May the heavens above continue to live
May the rains continue to dampen the land
May the wet forests continue to grow
Then the flowers shall bloom
And we people shall live again.
—traditional Hawai’ian prayer
Schedule a field trip to a location in your local watershed. You want some place that’s relatively close to your regular meeting place so it doesn’t require a long drive.
The goal of the field trip is mostly to get outdoors and have a good time. If the weather is poor, put off the field trip until you can have a good time.
A secondary goal of the field trip is to see something significant in your local watershed. Contact your local watershed association to see if they have ideas for you.
November/1: Learn How To Build Fires in a Firepit (outdoors)
Ecojustice Elder:
Ishi taught Anglos his outdoors skills, including fire building.
Tools:
One or more firepits
Hose with running water
Materials:
Tinder (e.g., scrap paper)
Kindling wood ranging in size from the diameter of your pinkie up to a couple of inches thick
Fuel wood
Matches
Session Plan:
See the Standard Lesson Plan for the opening, and the closing.
Suggested reading: “Points of View” by Ishmael Reed
Use the attached PDF to teach the teens how to build fires.

Building fires is typically one of the favorite activities among the teens. We finally went out and got a second firepit so that the teens didn’t have to wait so long for another turn. We found one for free on NextDoor.
November/2: Games of Stealth (indoors or outdoors)
These games can be played indoors, but work best in a large space.
Ecojustice Elder:
Harriet Tubman was a skilled naturalist and outdoorsperson who could sneak up on animals when she needed to hunt them for food. In addition, her skills in stealth helped her lead enslaved persons to freedom.
OR
Ishi taught Anglos his outdoors skills, including tracking animals for hunting.
Materials:
Blindfolds, 3 large foam balls
Session Plan:
See the Standard Lesson Plan for the opening, and the closing.
Suggested reading: “Nebi” by Cheryl Savageau
Go over the reasons why you want to learn stealth (see handout below).
Then play one or both stealth games.
If weather permits, you can try going outdoors and trying to get close to animals. How close can you get to a squirrel?

Autumn/1: Gardening projects
ECOJUSTICE ELDER:
Cesar Chavez showed how commercially grown food can exploit farmworkers. By growing our own food, we experience solidarity with farmworkers, and we can empathize with their desire for safe working conditions.
TOOLS:
Enough gardening tools for all the teens to be able to use something
PREP:
Check the garden beds, make sure there’s something for the teens to do.
SESSION PLAN:
See the Standard Lesson Plan for the opening, and the closing.
Suggested reading: “Set the Garden on Fire” by Chen Chen (not available online, see the book Ghost Fishing: An Ecojustice Poetry Anthology).
Ideally, Ecojustice class will have one or more gardens to tend.
In the autumn, you could devote one full session to end-of-season tasks such as cleaning out crops that have gone by, etc.
If the class does not have a garden yet, or if the class is developing a new garden, several sessions can be devoted to digging the garden, maybe building raised beds, and planting winter crops or cover crops. This could become a major project — see the Major Project page for information about multi-week projects.
As we developed Ecojustice Class, we noticed there were some years when the teens were very interested in gardening, other years when they weren’t. If this year’s class likes gardening, you might want to plan more year-round gardening activities including:
digging new garden beds in late fall or early spring
adding or expanding raised beds in late fall or early spring
creating cold frames or cloches in late winter or early spring
installing rain barrels in spring
Autumn/2: Citizen science
SESSION PLAN:
See the Standard Lesson Plan for the opening, and the closing.
Suggested reading: “Once the World Was Perfect” by Joy Harjo
Identify a citizen science project that the teens could realistically participate in during a regular class session.
The Great Sunflower Project has a good project for tracking pollinators. The observations can be completed in one class session. Global Pollinator Watch has a similar program. (And if there’s someone in your congregation who’s an entomologist, they might be able to help out with this.)
If you have a serious birder (bird watcher) in your congregation who uses eBird, they could take the teens on a bird walk, and show them how eBird works.
If you have someone in your congregation who’s a serious user of iNaturalist, they may be participating in one of the citizen science projects on that platform. Ask them if they could share their knowledge with the teens.
Autumn/3: Rocket stoves
This activity takes a fair amount of preparation, so it’s not listed as a regular activity. But there is so much to be gotten from this lesson that it’s worth the time (if you have the time).
WARNING: If a concrete block rocket stove gets wet (from rain, etc.), DO NOT USE IT until it is thoroughly dry. Water in the concrete can turn to steam from the heat of the fire, causing the block to shatter and spew sharp bits everywhere.
ECOJUSTICE ELDER:
Rocket stoves were designed to help make more efficient use of wood as a fuel, and also designed to produce less harmful smoke. In many places in the world, women do all the cooking, and if they have to cook over wood fires the smoke from those fires can have an adverse effect on their health. In addition, as population increases, and as the effets of global climate change are felt, women may have to travel further and further to gather an adequate supply of wood for fuel; by using a more efficient stove, the women can spend less time gathering fuel. Today’s Ecojustice Elder is Wangari Maathai, because she saw how women are affected by environmental problems.
MATERIALS:
Purchase the materials listed in the PDF “How To Make Concrete Block Rocket Stoves” (total cost about ten dollars)
PREP:
Set up the rocket stove
Now learn how to use it. Light it. Keep the fire going for a while. Put it out according to the instructions.
SESSION PLAN:
See the Standard Lesson Plan for the opening, and the closing.
Suggested reading:
“I reflect on my childhood experience when I would visit a stream next to our home to fetch water for my mother. I would drink water straight from the stream. Playing among the arrowroot leaves I tried in vain to pick up the strands of frogs’ eggs, believing they were beads. But every time I put my little fingers under them they would break. Later, I saw thousands of tadpoles: black, energetic and wriggling through the clear water against the background of the brown earth. This is the world I inherited from my parents.
“Today, over fifty years later, the stream has dried up, women walk long distances for water, which is not always clean, and children will never know what they have lost. The challenge is to restore the home of the tadpoles and give back to our children a world of beauty and wonder.”
— Wangari Maathai, from her Nobel Prize lecture (10 December 2004)
We usually assemble the rocket stove before the class, then spend the class learning how to light it, how to keep it going, and then cooking over it. However, we have also had enough concrete blocks for two rocket stoves, have one pre-assembled, then while some teens are learning how to use the rocket stove the others are learning how to assemble a rocket stove.
Background:
Rocket stoves were developed by Dr. Larry Winiarski and others for use in developing areas where biomass is the primary fuel source for cooking. Rocket stoves make much more efficient use of fuel, and produce less harmful smoke and emissions. Winiarski shows how to make a rocket stove for use in developing countries in this video. Rocket Stoves can also be used in disaster response, as in this video.
Overview of Rocket Stoves:

How To Make Concrete Block Rocket Stoves:

Using Concrete Block Rocket Stoves:
Concrete block rocket stoves can be fussy to use!
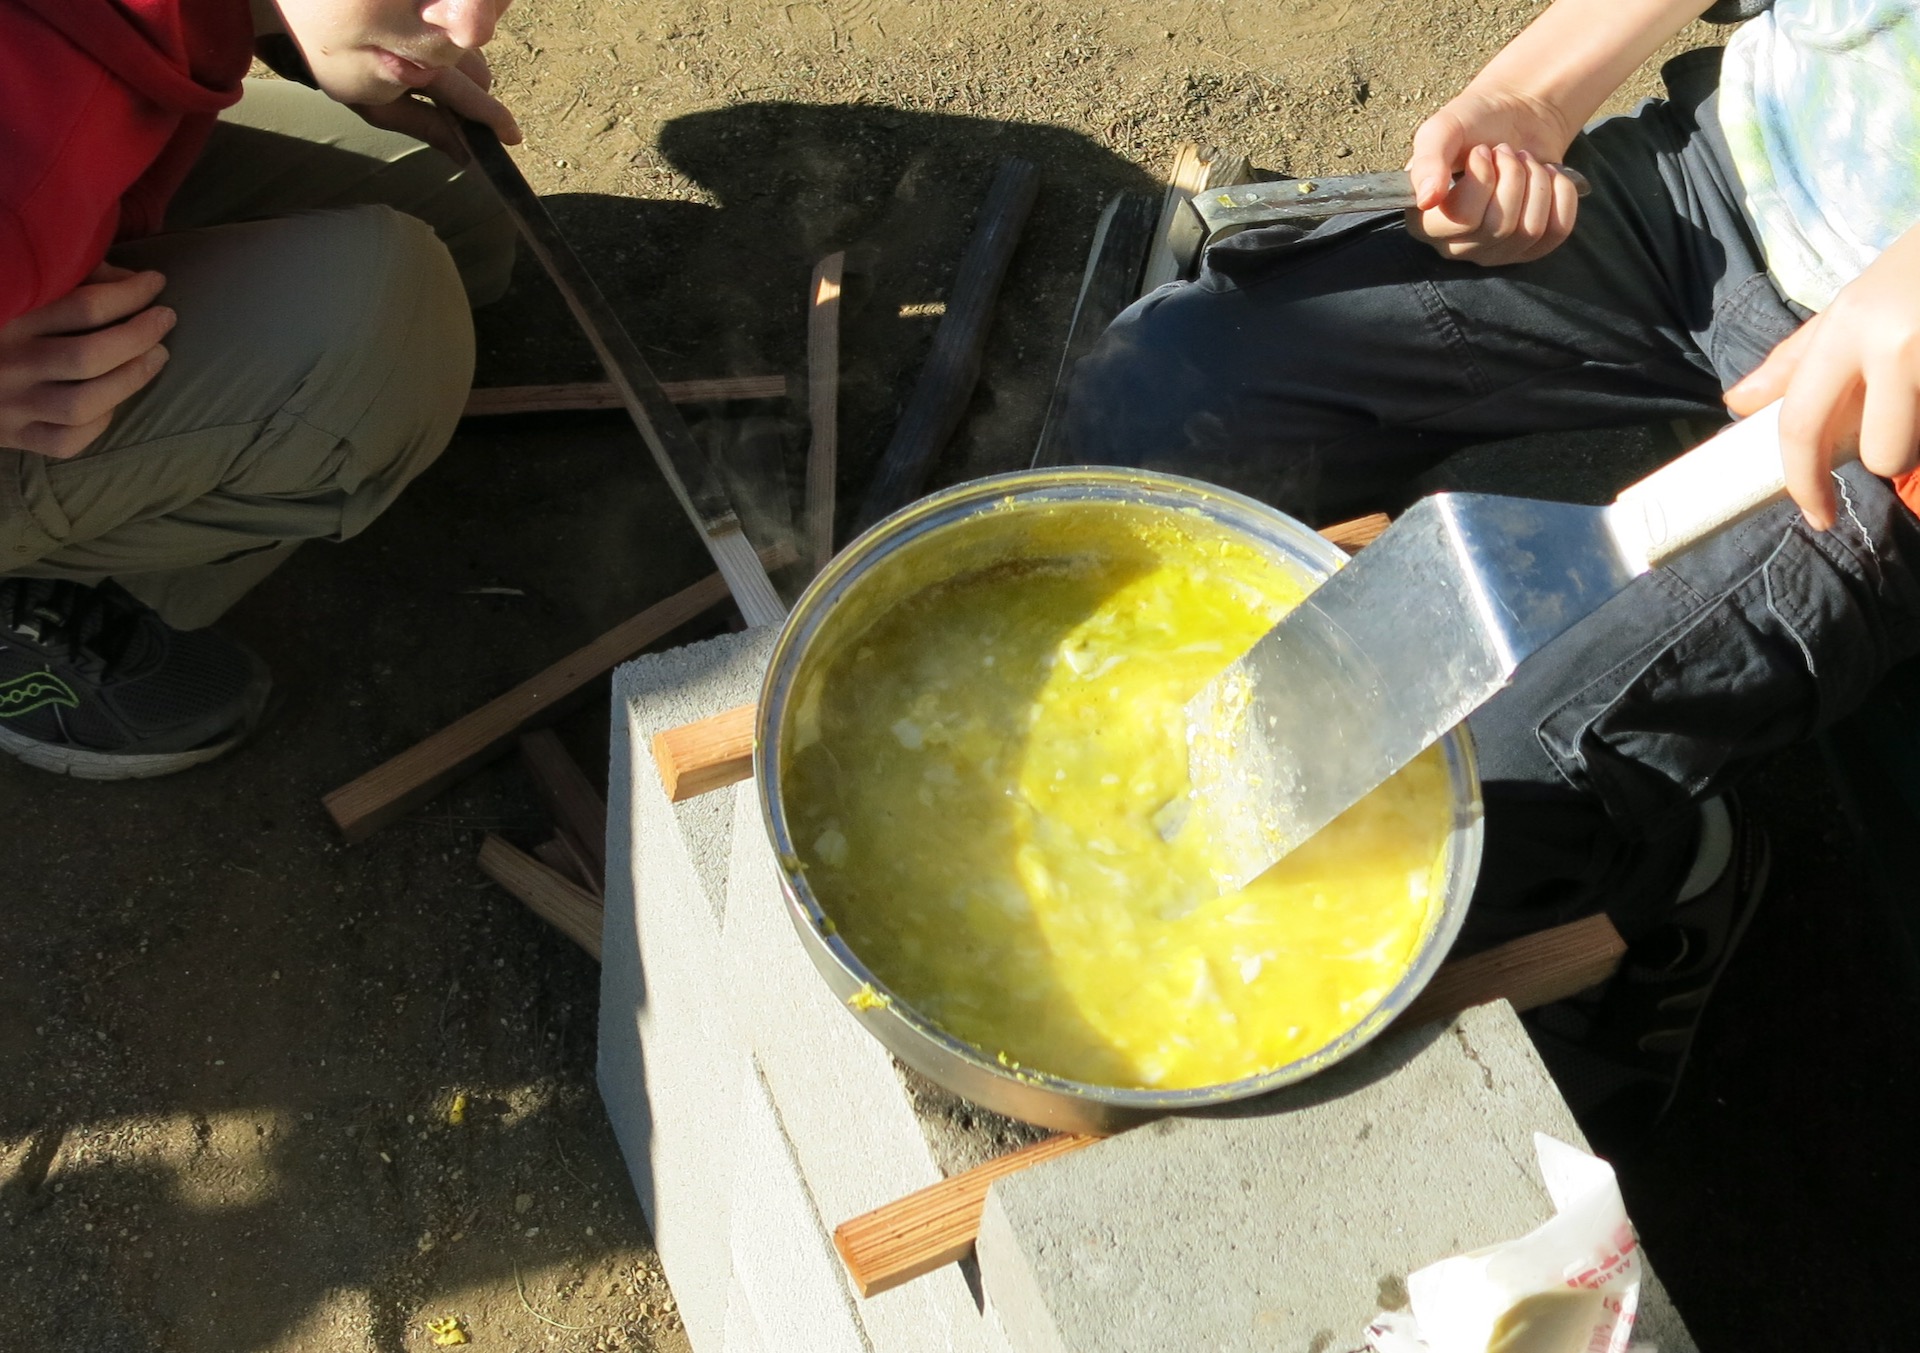
(A) The concrete is not a particularly good insulator, so often the stoves don’t work well until they’ve had a fire burning in them for 15 minutes or so. (B) The wood burns pretty quickly, so you have to tend the fire constantly, feeding and pushing the sticks in to the combustion chamber so the fire doesn’t die out. (C) Rocket stoves are like Goldilocks. They don’t like too much wood. They don’t like too little wood. They like just the right amount. For the typical concrete block rocket stove, “just right” is 3 sticks about 1-2 inches in diameter (though that can vary depending on how easily the wood burns).
Because they’re fussy, we’ve learned to have one teen tending the fire (sitting on the ground or kneeling), while another teen cooks. That’s what you see in the photo above. Having one teen both tend the fire and cook doesn’t work well.
We’ve also learned that you want to have extra wood stacked next to the stove. When you need a fresh piece of wood, usually you need it RIGHT NOW, and you don’t have time to dash over to a wood pile to get it.
To put out the fire, DO NOT pour water directly into the stove. If you do, you’re likely to crack the concrete blocks. Instead, get a bucket of water, and hold the bucket in front of where you feed fuel into the rocket stove. Pull out any fuel that can be handled safely, and dunk it in the water. Then use a long stick to carefully rake out the burning coals into the bucket of water.
Rocket stove photos

Above: A newly assembled rocket stove all ready to light. Notice the wood stacked conveniently below where you feed the fire.
Above: Cooking on the rocket stove. Notice how one person is cooking, and the other person is feeding the fire.
Winter session plans
December/1: Making food for social hour (indoors)
Ecojustice Elder
Rachel Carson raised awareness about toxics in the environment. Providing organic food helps keep toxic chemicals out of the environment.
Session Plan:
See the Standard Lesson Plan for the opening, and the closing.
Suggested reading: “Who Would Be Free, Themselves Must Strike the Blow” by June Jordan (not available online, see the book Ghost Fishing: An Ecojustice Poetry Anthology).
Make sure the teens know what organic food is — it’s food grown without long-lasting pesticides, and without chemical fertilizers.
Get permission to have access to your kitchen. Arrange to have the teens provide the food for social hour this week.
Cook some organic treats to serve at social hour. You need things that you can cook during a 45 minute class session.
Ideas:
— cut up organic fruit
— muffins made with organic ingredients
— pancakes made with organic ingredients
While preparing the food, you might want to talk about how organic food costs more than food grown with chemical pesticides and fertilizers. Is this fair for people who can’t afford organic food? What can be done?
If the group is big enough, not everyone will be able to cook. But the others can make signs explaining how you used organic ingredients, and why organic ingredients are good.
January/1: Knife Safety and Whittling (indoors or outdoors)
Ecojustice Elder:
Ishi taught Anglos his skills in using woods tools.
Tools:
We find the Victorinox Bantam knife is relatively affordable, while offering good quality.
Prep:
Make sure all the pocket knives are sharp. A sharp knife is a safe knife.
Make sure YOU know how to use a pocket knife safely. If you don’t, find someone who does!
Materials:
We’ve tried buying expensive blocks of carving wood. But honestly, what the teens like best is whittling sticks they pick up on the ground. Green wood works best.
Session Plan:
See the Standard Lesson Plan for the opening, and the closing.
Suggested reading: “Old Woman Nature” by Gary Snyder
Use the PDF below to teach knife safety, and basic whittling.
Setting up the class: We have found from experience that everyone should be sitting in a chair at a table. Space class members out about 4 feet, so they can’t swing their knife and cut someone. Having them whittle at a table means that their legs (including their femoral arteries) are protected by the table.
We recommend the pocket knife safety guidelines from the Girl Scouts of Maine.

January/2: Knots (indoors or outdoors)
Materials:
We like to use 1/4 inch diameter cotton clothes line for knot tying practice. It’s relatively inexpensive, it’s easy on your hands (unlike manila rope), it doesn’t slip (unlike nylon and polyester rope). You’ll want 2 – 10 foot lengths for each teen.
You’ll also want some poles to tie things too. Broom handles work well.
Prep:
Learn how to tie some knots yourself. If you don’t know how to tie knots, find someone who does. Teens enjoy meeting adults who can tie some of the more exotic knots, like monkey’s fists.
Session Plan:
See the Standard Lesson Plan for the opening, and the closing.
Suggested reading: “The Bear at the Dump” by William Matthews
Show the teens how to tie some of the knots in the Knots chapter in the Ecojustice Outdoors Book.
We usually demonstrate a couple of the easy knots, and let them practice those for a bit. Typically, teens in the class will learn at different rates, so some will still be learning one knot while others come to you to be taught a new knot.
January/3: Water purification
Ecojustice Elders:
Learn about the Other Ecojustice Elders who have worked on water issues: Catherine Coleman Flowers OR Esther Gulick, Sylvia McLaughlin, and Kay Kerr.
Tools/Materials:
Backpacking water purifier (filter and pump type)
Water purification tablets
Bleach, water dropper
Safety glasses
Water bottles
Campstove and pan for boiling water
Water
Cups (for sampling purified water)
Prep:
Read the instructions on the water purification tablets you got. Some types of tablets require an extended waiting period. If so, use the water purification tablets in the water far enough in advance so that the teens can safely sample it during class. You’ll also want another water bottle so you can show them how to dissolve the water purification tablets.
If you’re unfamiliar using a water purifier (filter w/pump), practice using it. Read the instructions so you know how to safely store your water purifier. E.g., some water purifiers require that you pump a dilute bleach solution through it before storing. If that’s true of yours, you’ll want to show the teens how that’s done.
Make sure you know how to boil water on the camp stove.
If you’ve never purified water using bleach, practice doing so. Make sure you get the measurements correct.
Session plan:
See the Standard Lesson Plan for the opening, and the closing.
Suggested reading: “The Negro Speaks of Rivers” by Langston Hughes
Demonstrate each of the water purification methods. As possible (given the class size), let the teens try each of the methods themselves. Make sure the teens wear safety glasses while using bleach.

February/1: Emergency Backpacks
Prep:
Check over your own go-bag, and see how it compares with the FEMA checklist below.
And if you don’t have a go-bag, before you say, “Gosh, that will takes too much time.”… Don’t put it off any longer, make up your go-bag NOW. You may need it tomorrow!
Session Plan:
See the Standard Lesson Plan for the opening, and the closing.
Suggested reading: “Thank You” by Ross Gay
You may be wondering what emergency preparedness is doing in Ecojustice Class. Ecojustice Class combines scouting-type hands-on activities with an understanding of environmental injustice. Emergency preparedness touches on both of these.
On the one hand, all outdoors people are better prepared for emergencies. After all, in an emergency, when the power goes out or the water main breaks, or a tornado or earthquake destroys your house, you may need all your outdoor skills — how to build a fire, how to purify water, how to put up a tent, etc.
On the other hand, in a time of worsening climate change, we’re going to be experiencing more severe weather events that bring on emergencies.
And on the other other hand, what you might go through during a weather emergency is pretty much what environmental refugees are going through. The difference is, in North America we’re likely to get relief from our weather emergencies within a few months, or within a few years for severe emergencies like Hurricane Katrina. Many teens these days would not be surprised if they became environmental refugees at some point in their lives. If that ever happens, we’re empowering them with skills that could help them take charge of their life.
One final thought about why emergency preparedness belongs in Ecojustice Class. One of the things we try to teach the teens is resilience — really practical hands-on resilience as well as mental resilience. Emergency preparedness is really all about resilience.
OK, enough preaching. Here’s the lesson:
Look over the PDF on emergency “go-bags.” One or both teachers should make up their own emergency go-bag. It’s also great if you can get someone to visit your class who has had Community Emergency Response Training (CERT).
Bring your go-bag to class. Ask the teens what emergencies might force them to evacuate their house. Depending on where you live, answers might include: earthquakes; wildfires; hurricanes; tornadoes; floods; etc. Also talk about what happens when the power goes out (no heat, no refrigeration, no lights, etc.).
(In northern California where this class was developed, the two big things we worry about are wildfires and earthquakes. We also have to deal with rolling power outages when power is shut of during “red-flag” weather, when there’s an extreme risk of wildfire. In case of an earthquake, you might have to evacuate your house due to earthquake damage. In the case of wildfire, you might have 30 minutes to evacuate your house and leave the area. So your go-bag should have things you’d want if you have to spend one or more nights in an evacuation center, and/or if you have to camp out outdoors.)
Now unpack your go-bag for the teens. Item by item, show them everything that’s in it, and explain why it’s there. Have them think about how their go-bag would differ from yours. If you want, you can photocopy the handout and give them copies to look at while you unpack.
If you’re going to go on the field trip next class, go over basics like comfy footwear, dress for the weather, etc.
February/2: Educate the Congregation
Ecojustice Elder:
Wangari Maathai helped educate people about ecojustice issues — both in her role as a college professor, and as a public spokesperson for ecojustice.
Materials:
For posters, you’ll want large paper, paint or colored pencils (we try to avoid markers because they’re disposable plastic), etc.
Session Plan:
See the Standard Lesson Plan for the opening, and the closing.
Suggested reading: “look at the blackbird fall” by June Jordan (not available online, see the book Black Nature: Four Centuries of African American Nature Poetry)…OR
“I am only one
But still I am one.
I cannot do everything,
But still I can do something,
And because I cannot do everything
I will not refuse to do the something that I can do.”
—Edward Everett Hale (Unitarian minister)
Have participants make posters that educate the rest of the congregation about a particular environmental issue.
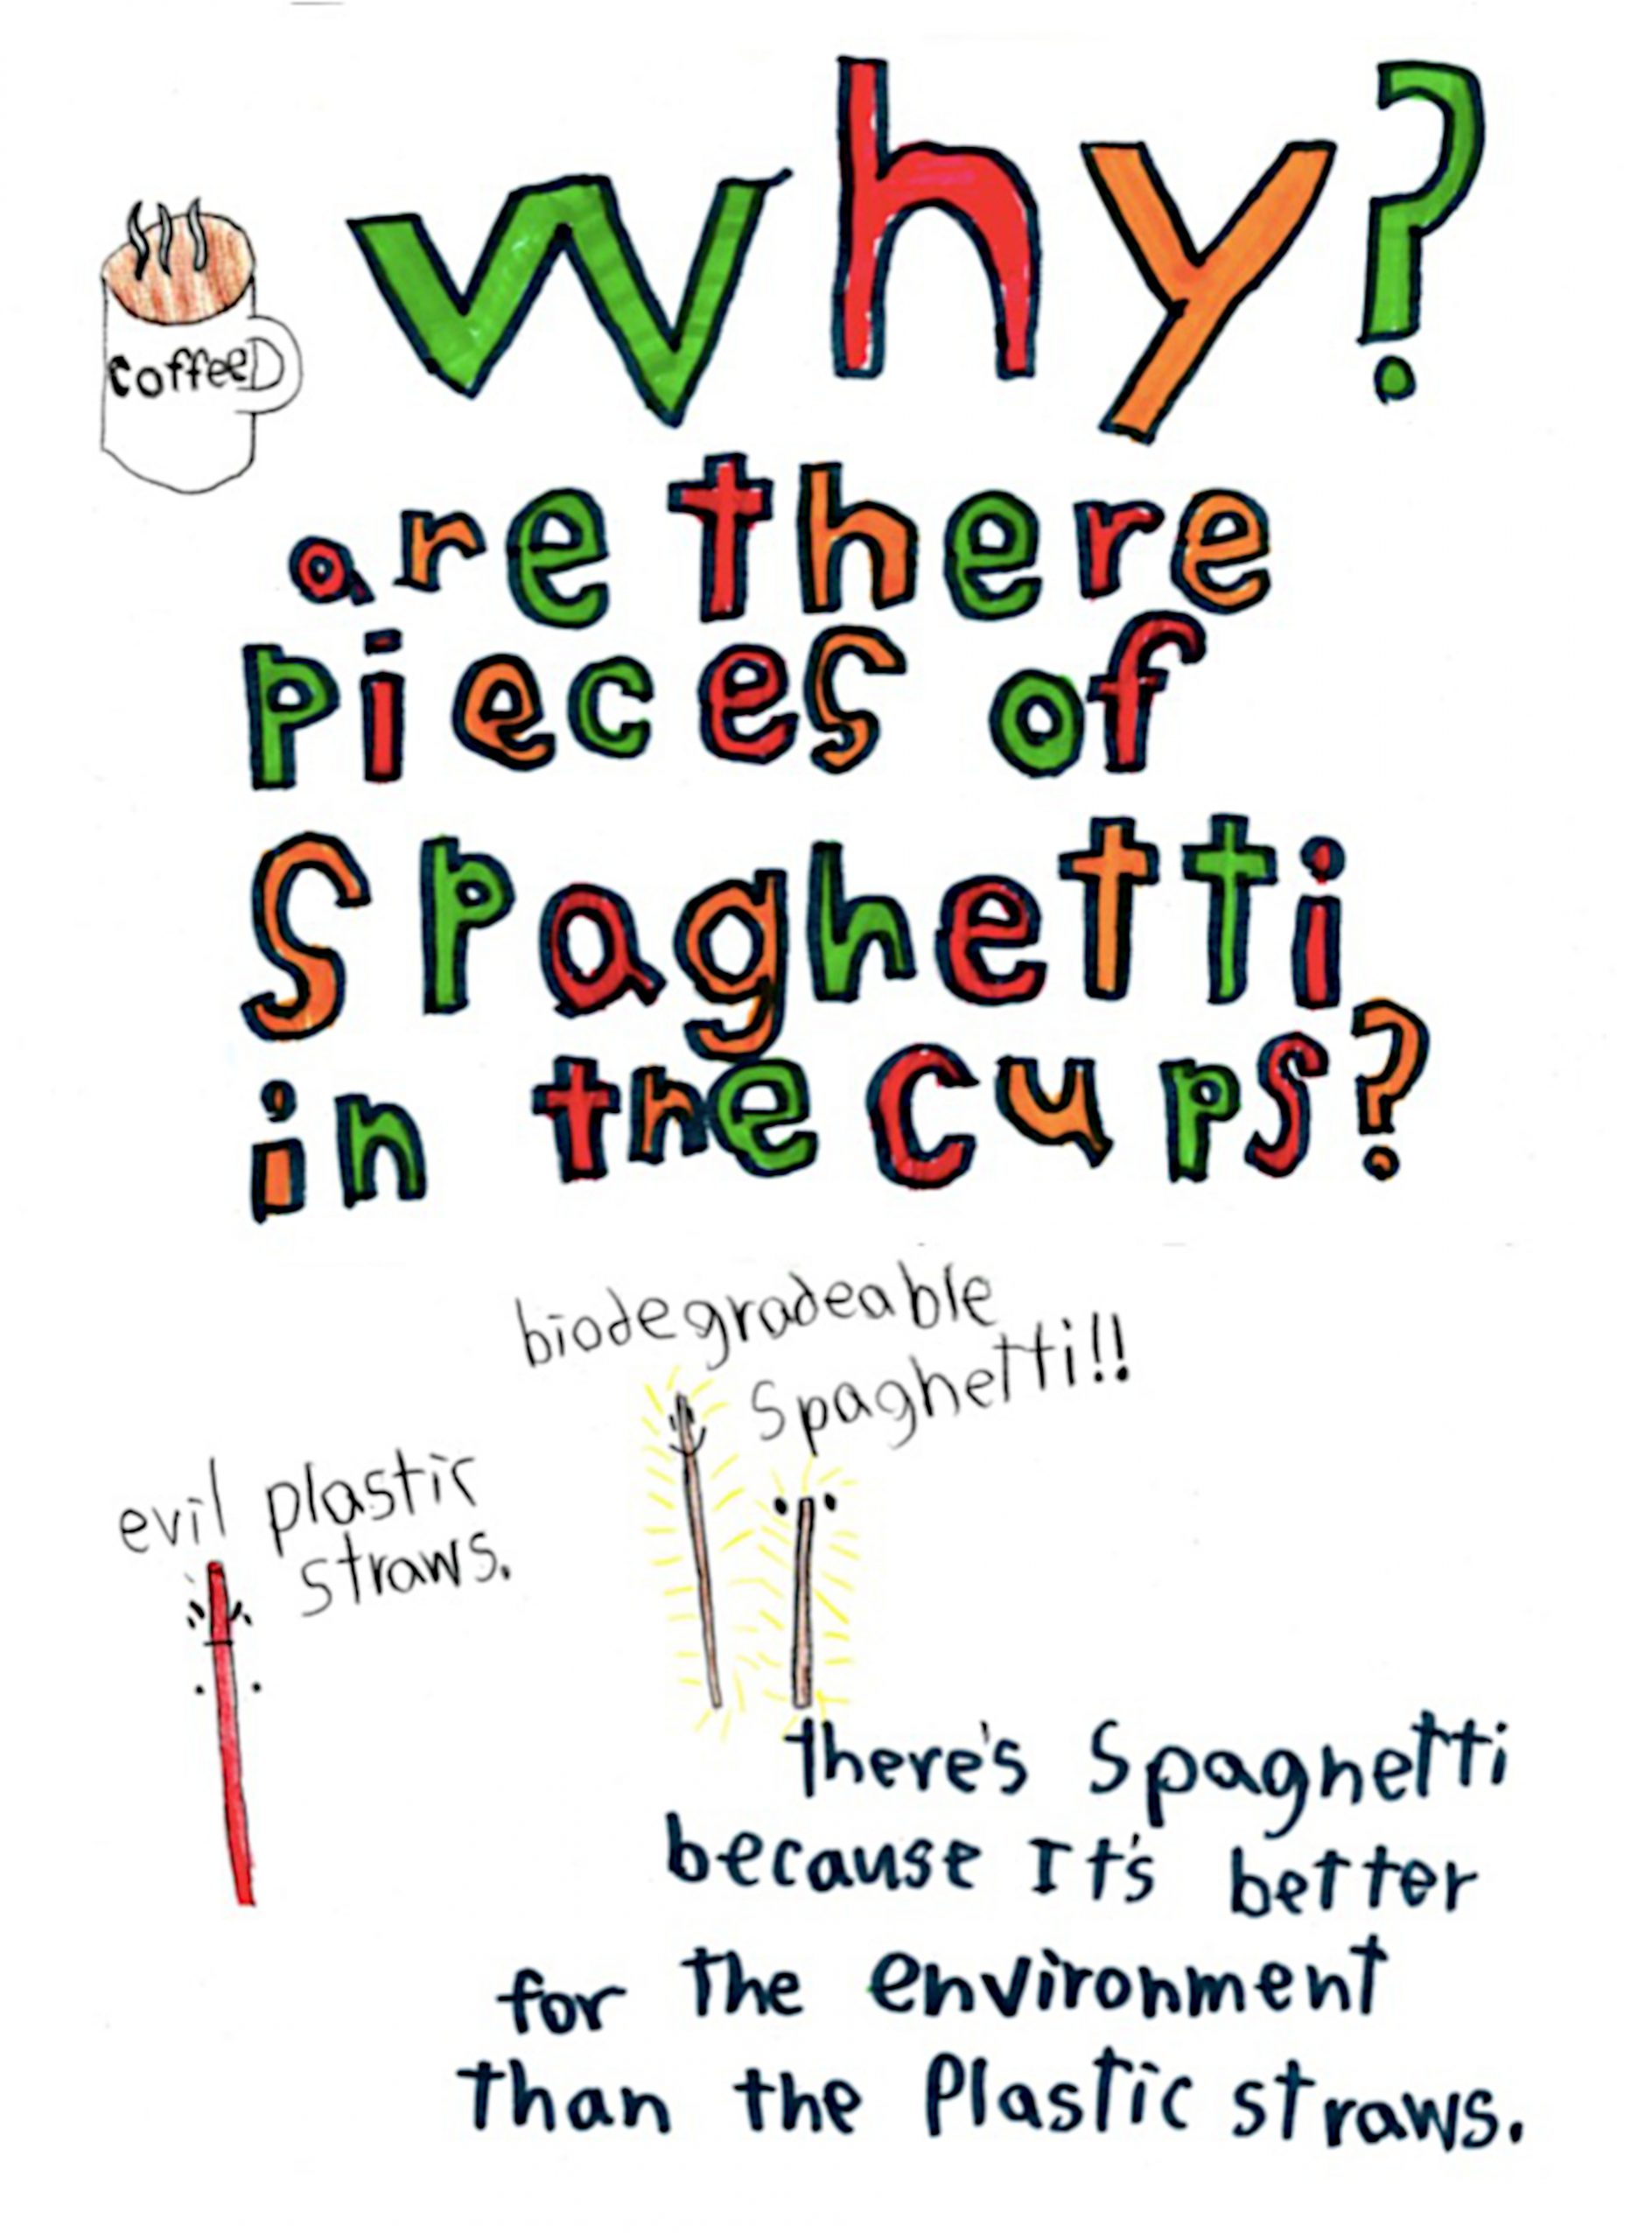
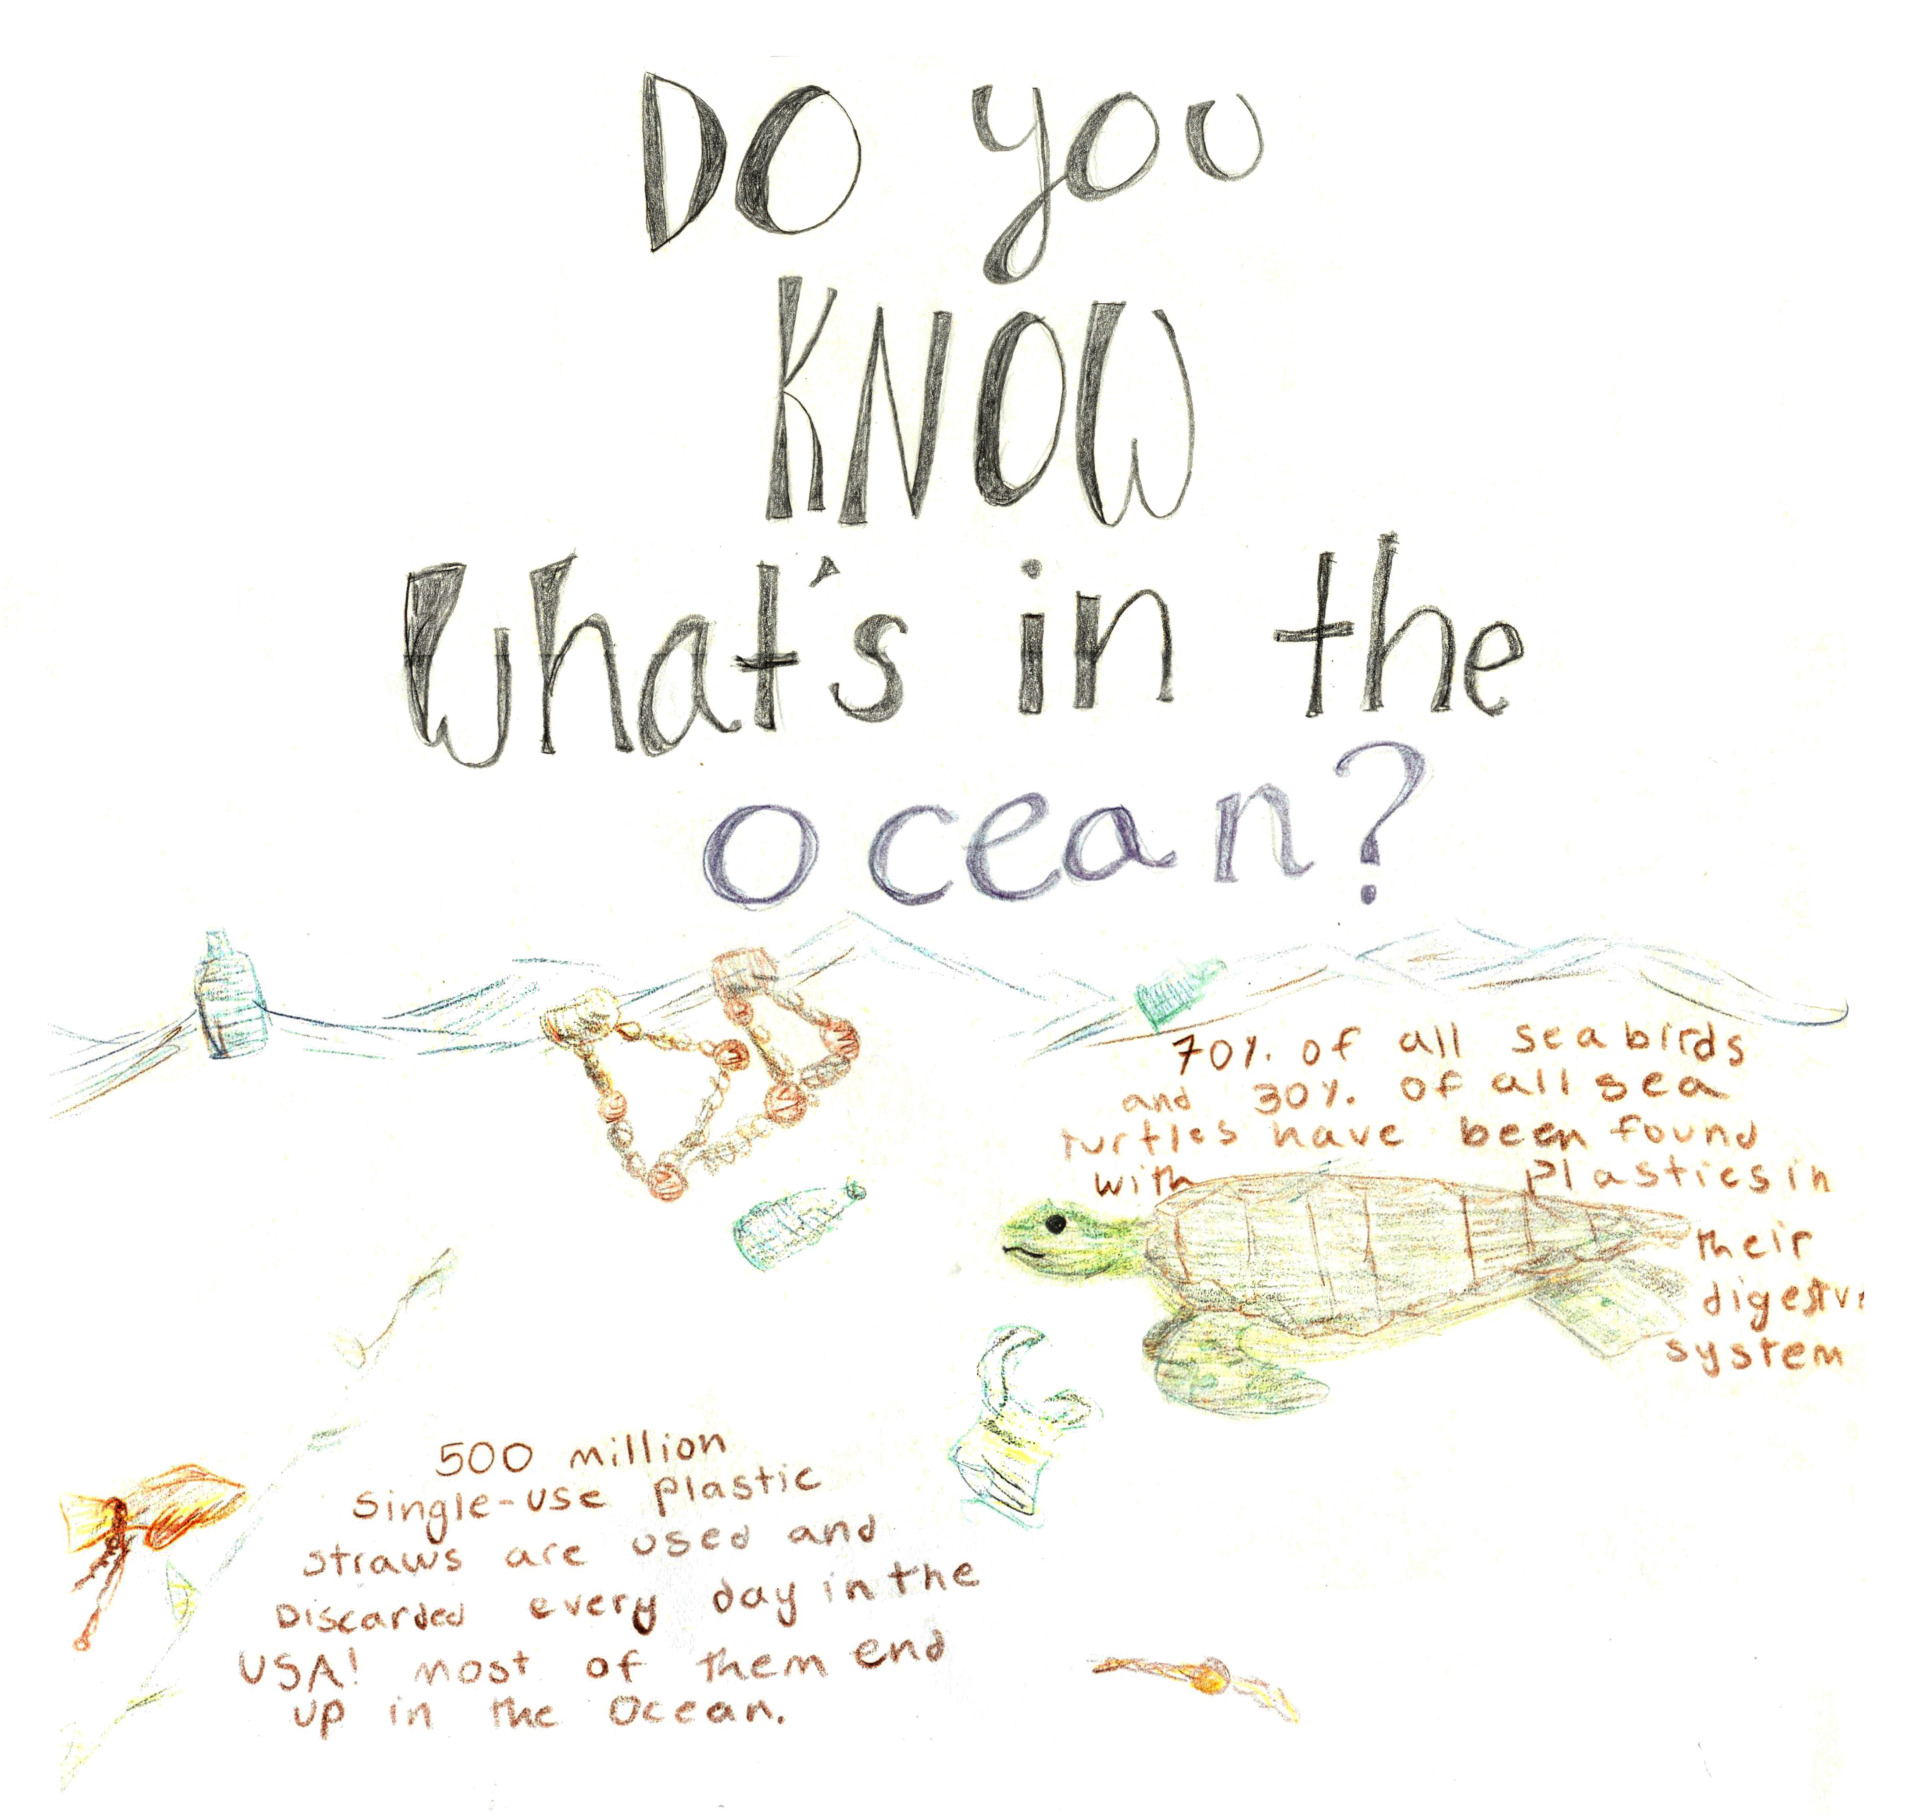
For example, back in 2018 in one congregation, the teens of Ecojustice Class decided to educate the rest of the congregation about plastics in the environment. At that time, the issue of plastics in the environment had not yet entered popular awareness in the way it did a year or so later. Yet plastics pollution had permeated children and teen pop culture. So this was an excellent topic for the teens to educate the congregation.
While they focused on posters, they also got broad flat pasta (fettucine) to serve as stirrers for the coffee. The fettucine replaced those horrid single use plastic stirrers (that don’t even work very well). James Kostka made the poster below to tell everyone what the fettucine was for:
Irene Vail made the poster below to educate the congregation about the dangers of plastic in the environment:
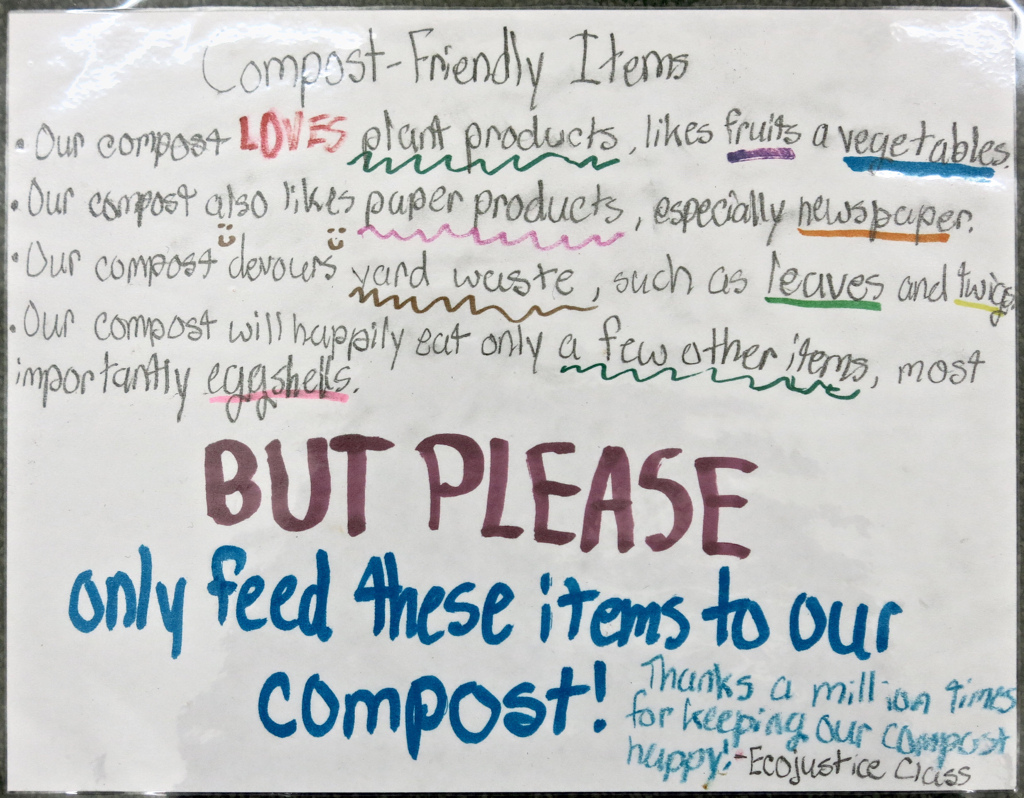
In another example, one Ecojustice Class in 2016 assembled a tumbling composter. The next week, they made several signs to educate the congregation. They made several signs posted in the church kitchen about saving compostable materials. They also made some signs to post at the composter, so people wouldn’t put the wrong things in it:
February/3: Winter explorations with field notebooks (mostly indoors, or outdoors)
Ecojustice Elder
Thoreau kept a journal.
Two activities are provided.
Do one, the other, or both.
See the Standard Lesson Plan for the opening, and the closing.
Suggested reading: “To Look at Any Thing” by James Moffitt “A Mancunian Taxi Driver Foresees His Death” by Michael Symmons Roberts
A: To Each its Own
20-30 minutes
Activity: Similar objects are matched with student’s drawings and descriptions of an individual object
Materials
— natural objects
— field notebooks, pencils
— magnifiers (magnifying glasses, hand lenses)
Session Plan:
Have the teens go outside and gather 1-3 natural items each. Examples: dried weeds, twigs from deciduous trees.
Next, the teens make diagrams of their object their natural objects in their field notebooks.
Remind the teens: You don’t have to know how to draw. We’re not really drawing here, we’re “diagramming” — making diagrams to show others what we saw.
If they’re working with twigs, they should use a magnifier, and draw small details of the buds — can they see the buds swelling? They can trace the twigs, then draw in fine details. They can supplement the diagrams with word descriptions. For an idea of what to look for in winter twigs, see the book A Bud and Twig Key to the More Important Broadleaf Deciduous Trees in the United States by Olenus Lee Sponsler (1916). Below is a drawing from that book. You’ll want to look for leaf scars, and the shape of bud and number of bud scales, among other things. So next to the diagram, you write in things like “3 bud scales,” “bud scars look like a little smiley face,” etc.

If they’re working with dried weeds, they can trace the general outlines, and again draw in details that they see through magnifiers.
When everyone has more or less completed at least one description — diagram with any needed word description — they put their natural object(s) on a table in the middle of the room.
Then everyone opens up their field notebook to the pages with their diagram/description. Lay out the field notebooks on another table.
Then as a group, pick one person’s diagram/description. See if you all can find the natural object they were describing (obviously, the person who made the diagram/description doesn’t say anything — unless the group asks for a hint).
Nature Activity: Zoom In, Zoom Out
In this activity, teens investigate and diagram an object in three scales and observe how features move into and out of focus at each scale: stand at a distance, stand close, use a magnifier.
About 15 minutes.
Materials
Field notebooks
Magnifiers
Pencils
Rulers
Preparation
The adult leaders can figure out what would be good objects to investigate. If the weather’s bad, pick an evergreen tree that you can see from a window in the room you’re in; then go out and collect small branches for each person in the class.
Session plan
Have the teens identify a tree that you’re going to work on.
On one page in your field notebook, draw a view of a small branch at actual size. Trace around the needles of the conifer, make a rubbing, whatever is easiest for you. Add written notes or measurements if you want.
Remind the teens: You don’t have to know how to draw. We’re not really drawing here, we’re “diagramming” — making diagrams to show others what we saw.
Next, choose some small part of the subject that you find interesting and draw a little circle around that part of your drawing. Use a magnifier to get a closer look at it. On the next page, draw a magnified view of that same area showing details that are too small to be shown in the life size picture. Again, add some written notes or measurements if you want.
Then make a final diagram, zoomed out to take in the whole tree and some of its environment. Again, add some written notes or measurements if you want. (Can you figure out how to measure the total height of the tree?)
Below is an example of three pages in your field notebook, showing the leaf from a sassafras tree, then a closeup of the leaf as seen through your hand lens, and finally a diagram of the whole tree. When you actually do this, you’ll write in measurements.
After 10 minutes, share the pages of your field notebooks with each other. Did everyone see the same small details when zooming in? How about when zooming out?
N.B.: With a small group, you can do this as a whole-group activity. Draw together on a flipchart, etc.

Winter/1: Tracks in the snow
Session Plan:
See the Standard Lesson Plan for the opening, and the closing.
If you get a snowfall where you’ll be able to see animal tracks, maybe you can go tracking! (It’s a great excuse to get outside and play in the snow.) Maybe you could record some of your observations with photographs.
Resources:
Maine tracks identification sheet, University of Southern Maine
Tracks in the snow, US Fish and Wildlife Service
Bird tracks in the snow, Audubon
Spring session plans
March/1: Another field trip (outdoors)
Ecojustice Elder:
Harriet Tubman was a skilled naturalist.
Prep:
Arrange transportation to the field trip site.
Visit the field trip site yourself. What will interest active teens? (Hint: You may decided to just let them explore.)
Session Plan:
See the Standard Lesson Plan for the opening, and the closing. (You can do the opening and closing at the field trip site, or before and after driving there and back — your choice.)
Suggested reading: “Now I hear the sea sounds about me; the night high tide is rising, swirling with a confused rush of waters against the rocks below my study window.… Hearing the rising tide, I think how it is pressing also against other shores I know—rising on a southern beach where there is no fog, but a moon edging all the waves with silver and touching the wet sands with lambent sheen, and on a still more distant shore sending its streaming currents against the moonlit pinnacles and the dark caves of the coral rock.… Once this rocky coast beneath me was a plain of sand; then the sea rose and found a new shore line. And again in some shadowy future the surf will have ground these rocks to sand and will have returned the coast to its earlier state. And so in my mind’s eye these coastal forms merge and blend in a shifting, kaleidoscopic pattern in which there is no finality, no ultimate and fixed reality—earth becoming fluid as the sea itself.” — Rachel Carson, from her book The Edge of the Sea
Schedule a field trip to an interesting ecosystem.. You want some place that’s relatively close to your regular meeting place so it doesn’t require a long drive.
The goal of the field trip is mostly to get outdoors and have a good time. If the weather is poor, put off the field trip until you can have a good time.
A secondary goal of the field trip could be a service project (e.g., trail maintenance).
March/2: Planting seedlings (indoors)
Plant seedlings in peat pots, to be transplanted later on outdoors.
Materials
— Peat pots
— Potting soil
— Seeds
If you’re going to raise seeds in the classroom, you’ll want to have some sort of self-watering system.
Session Plan:
See the Standard Lesson Plan for the opening, and the closing.
Suggested reading (especially if you decide to plant greens!): “cutting greens” by Lucille Clifton
Ideas
It’s more fun if you have the teens plants seeds for two purposes: (1) Pots with seeds that they can take home to grow, and (2) Seedlings that you’re going to raise in your classroom for a garden you have at your congregation.
Pollinator-friendly plants: If you have a pollinator garden, plant some new seeds to go into the pollinator garden
Native plants: To find out if a plant is native in your county, check the Go Botany website from the Native Plant Trust. You’ll get best results if you enter the scientific name into the search box (because common names vary so much).
Vegetables: If you have a garden where you can grow vegetables on your campus. Best to grow early veggies, that will mature before class is over.
March/3: Natural Dyeing (indoors)
Ecojustice Elder
Rachel Carson raised awareness about toxics in the environment. Often, toxic processes are used to dye clothing with chemical dyes. On the other hand, many natural dyes aren’t completely lightfast or washable.
Session Plan:
See the Standard Lesson Plan for the opening, and the closing.
Suggested reading: “Federico’s Ghost” by Martin Espada — In our experience, the teens don’t get this poem on the first reading. So we like to read it once, explain the bits they don’t understand, then read it again.
In this session, you’ll be dyeing fabric with natural dyes.
In southern New England, the easily-available dye plants are not in season in March. So instead of foraging for dye plants, in this session you’ll use plants from the supermarket.
Materials
— Cloth to dye:
Wool takes dye better but is expensive. We have used unbleached cotton muslin successfully. If you want to try tye-dyeing, be aware that the natural dyes listed below are not very color-fast — they will wash out, and/or fade on exposure to sunlight.
— Pots and pans to boil dyestuff in
— Dye plants from the supermarket:
Turmeric
Red cabbage
Beets
Spinach
How to dye
One process for natural dyeing may be found here.
March/4: Repeat activities
Repeat an activity that the teens liked from earlier in the year:
Whittling
Building fires
Cooking on a camp stove
Games
Trail signs
Or you could continue natural dyeing from the previous week.
April/1: Helping out bees (indoors)
Ecojustice Elder:
Bee populations worldwide are declining. There are many causes contributing to declining bee populations, including toxics in the environment. So today’s Ecojustice Elder is Rachel Carson, who fought against toxics in the environment.
OR
Cesar Chavez, who worked to keep both farmworkers and our food supply safe.
Materials:
For the bee watering stations, see this website
For bee houses, find instructions for bees that live in your area. We like these instructions from UC Davis.
Prep:
It’s a good idea to build them yourself before building them with the teens.
Tools:
Drills
Tools to cut bamboo or other tubes (probably saws)
Safety gear (eye protection, ear protection)
Session plan:
See the Standard Lesson Plan for the opening, and the closing.
Suggested reading: “The Bees” by Audre Lourde (scroll down to read the poem)
Bee populations around the world are in decline. This is seriously worrying, because bees are some of the most important pollinators. The University of California Davis has information on the decline of California wild bees. In addition, UC Davis researchers have found that toxics in the environment are contributing to declining populations. So anything we can do to support bees is A Good Thing.
For the bee houses, you’ll probably want to make both the type that’s made up of little tubes stacked up, and the type where you drill holes in blocks of wood.
If you’re using a power drill, one adult will have to supervise this. It’s possible to have one adult supervise two drilling stations side by side.
The other adult can lead the teens in making bee watering stations. Some teens really get lost in a fantasy world as they make bee watering stations — which is a good thing, and to be encouraged.
Some teens will want to set up their bee watering stations immediately, and watch to see if bees come. Make sure the teens know that most bees are seasonal. April is too early for many bees, though you might attract some! — but really, this activity is to be ready for bees before they arrive back on the scene.
Supplemental activity: Work on Pollinator Garden
Work on maintaining a pollinator garden. (If you have a pollinator garden on campus — if you don’t, maybe Ecojustice Class could start one.)
April/2: How To Set Up Tents (indoors or outdoors)
Materials:
Tents, approx. one tent for every 2-3 teens in the class
Ground cloths or “tent footprints”
Prep:
Find a nice grassy area where you can set up the tents. This will protect the tent floor.
If a nice grassy area isn’t available, I’ve done this activity in a paved parking lot by putting down large painter’s drop cloths to protect the tent floor. (We had to use self-supporting tents, of course, because there was no way to drive tent pegs into the paving.)
Session plan:
See the Standard Lesson Plan for the opening, and the closing.
In preparation for an overnight camping trip, have the teens learn how to set up tents in teams of 2-3. Then have them pack the tents up again.
Now have a competition. Who can set up their tent fastest?
Make sure the teens know the Prime Rules for Tents:
No Food in Your Tent!
Once your tent is set up, never bring food inside it. Never, not even for an instant. Food can leave an odor that attracts animals. Believe me, you don’t want to be awakened in the middle of the night by a couple of hungry raccoons trying to get in your tent. So—no food in the tent, not ever.
No Shoes in Your Tent!
Never wear your shoes in your tent. You don’t want to bring dirt and sand inside the tent. Leave shoes at the tent door. Keep the inside of the tent clean.
April/3: How To Pack a Pack, and Planning for Camping (indoors)
Prep:
Teachers pack their own packs and bring them to class. Use the packing list below — or if you have other preferred packing checklists, make your own handout and pack your pack according to your handout.
Print out the standard checklist for packing, one for each teen.
Have ideas ready for easy food to cook.
Session Plan:
See the Standard Lesson Plan for the opening, and the closing.
In preparation for an overnight camping trip, learn how to pack your pack. The teachers should pack their pack, using a standard checklist. A PDF of the checklist we use is below — you may have to alter this for your climate/season.
Bring in your packed pack, unpack it for the teens, then show them how it all goes together again. Go over the packing list. Help the teens come up with alternatives if they don’t have everything on the list.
In this class, you’ll also want to plan out the food. And decide who’s going to do the cooking (we like to have the teens cook, while the adults help out). And go over any rules you may have (e.g., lights out at 9:30 p.m. so you can get up early, etc.).
See the “Logistics” section in Session 18.

May/1: Overnight Camping Trip (outdoors)
Go on the overnight camping trip!
A long reading for use on the camping trip: “Smokey the Bear Sutra” by Gary Snyder

Logistics:
Parents like to have a couple of months advance notice for overnight trips. Ideally, you’ll set the date for the overnight at the beginning of the school year, and let the parents know then.
Make sure you reserve a group campsite well in advance. Group campsites often fill up 6 months to a year in advance.
A month in advance, you’ll want to arrange to have enough adults along. A 1:5 ratio is ideal for a campout, esp. where some of the teens may never have camped before. Families of the teens are always warmly welcomed!
Make sure you comply with the congregation’s safety policy regarding tent assignments. We have found that it’s best to have many smaller tents. You must ask parents to decide who gets to share a tent with whom — expect many families to want teens to sleep alone in a tent.
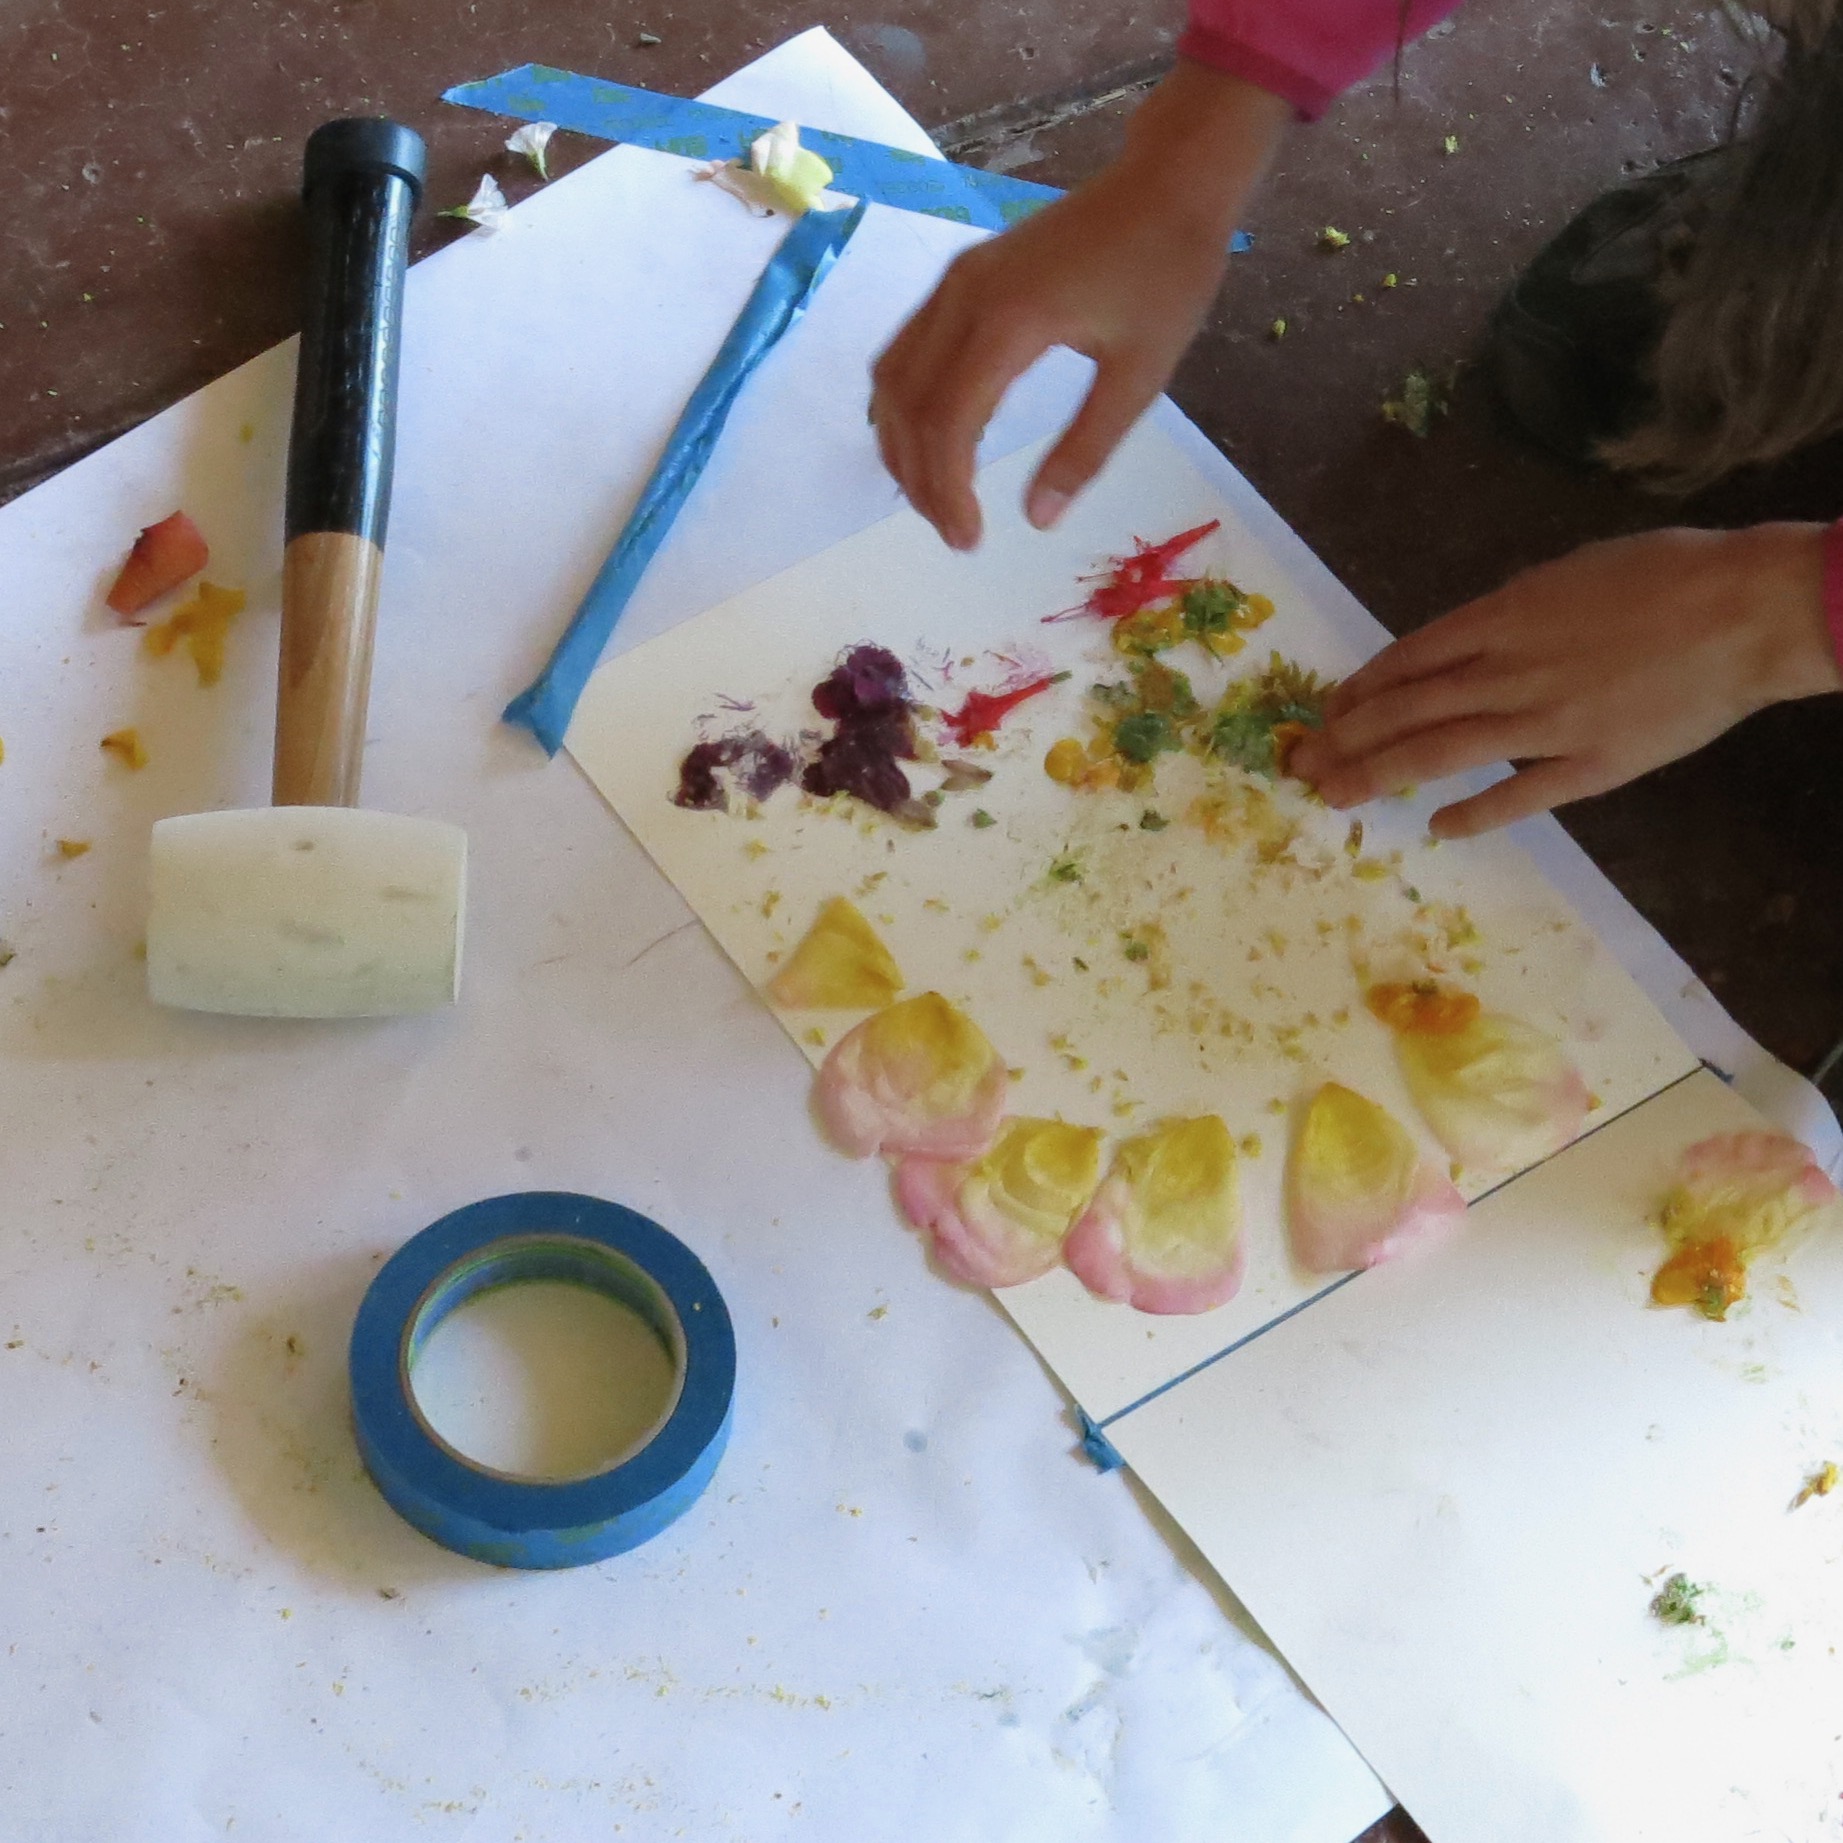
May/2: Pounding Flowers & Dissecting Flowers
These two activities are combined. The emphasis is on pounding flowers. Teens who finish quickly with pounding flowers can go on to dissect flowers.
Materials:
Pounding flowers:
Water color paper (this is important, as regular paper doesn’t work well)
Rubber mallets
A dozen or so fresh flowers, stems, leaves per participant (from florist or garden)
Paper towels
Scissors
Blue painter’s masking tape
Colored pencils (for labeling, messages, or poems if desired)
Dissecting flowers:
One or two flowers per participant (from florist or garden)
Sharp knife, e.g., Xacto knife
Flower anatomy handout
Notes on getting flowers:
The fresher the flowers, the better this activity will work. If they’re dried out, they won’t have much juice to be pounded out on the paper.
Even if you’re planning together flowers from a garden / the wild, we’ve found that getting some from a florist can be a good idea, because wild flowers and garden flowers don’t always produce brilliant colors. The point is to have as many different kinds of flowers as possible so you can compare.
White and pale blossoms do not show up well when pounded on white paper!
Rubber mallets vs. hammers:
You can also do this activity using a regular hammer. Hammers may be easier to find than rubber mallets.
If you use regular hammers, you must hammer gently.
If you hammer too hard, you’ll tear the paper. And probably break whatever you’re hammering on.
Prep:
Get fresh flowers from florist in morning
If there are flowers in bloom, gather some before class
Session plan:
See the Standard Lesson Plan for the opening, and the closing.
Suggested reading: “Umpaowastewin” by Margaret Noodin (read the parts in Ojibwe the best you can!)
If you’re going to gather flowers from outdoors, do that first (obviously).
Pounding must be done on a smooth hard surface. A smooth concrete floor works well. Floors covered in linoleum, vinyl tiles, or wood also work well. A very solid table can work, but trying pounding on it with a rubber mallet first to see if the table is sturdy enough. Pad the surface under the flowers with newspapers to avoid harming (or even cracking) the surface.
Note that any pronounced surface texture may affect the outcome (e.g., some wood floors; or textured vinyl floors). Small irregularities in the surface texture can be covered over by laying down several sheets of newspaper first.
Method 1:
Have each participant lay out 1 sheet water color paper on the ground. Choose one or two flowers and arrange them on paper as they like. Carefully lay paper towels over flowers. Take mallet and pound paper towels as hard as they want. Carefully peel back paper towels, then leftover petals, etc. to see print left on paper.
Method 2:
Tape two sheets of watercolor paper together in a book format, using blue painter’s masking tape. Open the “book.” Arrange the flowers on one sheet. Close the “book.” Pound away. Open the “book” to see the design appear on both pages.
You don’t really get a finished product with this activity. This is more of a sensory awareness activity, designed to get you to look at flowers in a new way. Which flowers had the most vivid dye colors in them? Which flowers were disappointing? Show each other the results of your pounding.
Once they have a sense of which flowers produce what colors, participants often want to pound flowers again. So it’s a good idea to have plenty of flowers.
Dissecting flowers:
Teens who are quickly done with pounding flowers can dissect flowers. The Los Angeles County Arboretum and Botanical Garden has an excellent guide to dissecting flowers, including a handout showing flower parts.
Spring/1: Gardening
ECOJUSTICE ELDER:
Cesar Chavez showed how commercially grown food can exploit farmworkers. By growing our own food, we experience solidarity with farmworkers, and we can empathize with their desire for safe working conditions.
TOOLS:
Enough gardening tools for all the teens to be able to use something
PREP:
NOTE: If you don’t already have a garden to work on, then this becomes a Major Project.
Check the garden beds, make sure there’s something for the teens to do.
SESSION PLAN:
See the Standard Lesson Plan for the opening, and the closing.
Spring garden projects include:
— weeding
— working in compost
— pulling out dead material from the previous year
— digging/preparing beds for planting
If you planted seeds in peat pots (March/2 session), you can get a garden bed ready and transplant the seedlings.
Other spring garden projects include:
— making a cold frame
— making or maintaining a compost pile
Spring/2: Invasives!
If there are invasive plants on your campus, consider learning about why they’re a problem (10 min.) — then go pull invasive plants and dispose of them properly — then during closing circle, reflect on how hard it is to get rid of invasive plants.
If you have someone in your congregation who knows a lot about invasive plants, invite them to come and show you good techniques for pulling invasives.
If you’ll be pulling Garlic Mustard, consider making pesto from it. More information and a recipe (see the sidebar) from Eat the Invaders website — read all the way to the comments on this webpage, where it says: “Unlike most wild greens, it’s the leaves from the stem of the 2nd year plant, when it’s flowering, that are the best.”
Multiple Sessions
There are several activities that some groups may want to do more than once. Over the years, we’ve found that we get requests for the following activities to either be repeated, or last more than one week:
Fire building (usually 2-3 weeks, as teens practice starting fires)
Cooking (usually not consecutive, but spread out during the year)
Whittling (sometimes 2 weeks required to finish projects)
Gardening (depends on the class; one class devoted many weeks to gardening, but other classes have had no interest)
See also the section on Major Projects.
Games
The Food Chain Game, Interdependence Games, and Migration Headache are simulation games which model ecological concepts. They are really good games. Unfortunately, the first two require more players than we usually have in our Ecojustice Class. The Web of Life Game and Migration Headache each require just 6 players (though they’re better with more players). See also Stealth Games and Trail Signs above.
1. The Food Chain Game
This game requires 15 players. It takes 30+ minutes to play.

2. Web of Life Game
This game requires at least 6 players, 8 or more is better. With 6 players, it takes about 10-15 minutes.

3. Interdependence games
These games require at least ten players. We have played these games for over an hour.

4. Migration Headache
You can play this with as few as 6 players. It takes about 20 minutes.
Link to a PDF with rules for Migration Headache.
Supplemental session plans
Supplemental plan no. 1: Rocket stoves
This session plan takes a lot of prep. You’ll need not just the concrete blocks, but wood that is the right size. Still, it’s definitely worth it, if you’re willing to put in the work.
Ecojustice Elder:
Rocket stoves were designed to help make more efficient use of wood as a fuel, and also designed to produce less harmful smoke. In many places in the world, women do all the cooking, and if they have to cook over wood fires the smoke from those fires can have an adverse effect on their health. In addition, as population increases, and as the effets of global climate change are felt, women may have to travel further and further to gather an adequate supply of wood for fuel; by using a more efficient stove, the women can spend less time gathering fuel. Today’s Ecojustice Elder is Wangari Maathai, because she saw how women are affected by environmental problems.
Materials:
Purchase the materials listed in the PDF “How To Make Concrete Block Rocket Stoves” (total cost about ten dollars)
Prep:
Set up the rocket stove
Now learn how to use it. Light it. Keep the fire going for a while. Put it out according to the instructions.
Session Plan:
See the Standard Lesson Plan for the opening, and the closing.
We usually assemble the rocket stove before the class, then spend the class learning how to light it, how to keep it going, and then cooking over it. However, we have also had enough concrete blocks for two rocket stoves, have one pre-assembled, then while some teens are learning how to use the rocket stove the others are learning how to assemble a rocket stove.
Background:
Rocket stoves were developed by Dr. Larry Winiarski and others for use in developing areas where biomass is the primary fuel source for cooking. Rocket stoves make much more efficient use of fuel, and produce less harmful smoke and emissions. Winiarski shows how to make a rocket stove for use in developing countries in this video. Rocket Stoves can also be used in disaster response, as in this video.
Overview of Rocket Stoves:
How To Make Concrete Block Rocket Stoves:
Using Concrete Block Rocket Stoves:
Concrete block rocket stoves can be fussy to use!
(A) The concrete is not a particularly good insulator, so often the stoves don’t work well until they’ve had a fire burning in them for 15 minutes or so. (B) The wood burns pretty quickly, so you have to tend the fire constantly, feeding and pushing the sticks in to the combustion chamber so the fire doesn’t die out. (C) Rocket stoves are like Goldilocks. They don’t like too much wood. They don’t like too little wood. They like just the right amount. For the typical concrete block rocket stove, “just right” is 3 sticks about 1-2 inches in diameter (though that can vary depending on how easily the wood burns).
Because they’re fussy, we’ve learned to have one teen tending the fire (sitting on the ground or kneeling), while another teen cooks. That’s what you see in the photo above. Having one teen both tend the fire and cook doesn’t work well.
We’ve also learned that you want to have extra wood stacked next to the stove. When you need a fresh piece of wood, usually you need it RIGHT NOW, and you don’t have time to dash over to a wood pile to get it.
To put out the fire, DO NOT pour water directly into the stove. If you do, you’re likely to crack the concrete blocks. Instead, get a bucket of water, and hold the bucket in front of where you feed fuel into the rocket stove. Pull out any fuel that can be handled safely, and dunk it in the water. Then use a long stick to carefully rake out the burning coals into the bucket of water.
Rocket stove photos
Above: A newly assembled rocket stove all ready to light. Notice the wood stacked conveniently below where you feed the fire.
Above: Cooking on the rocket stove. Notice how one person is cooking, and the other person is feeding the fire.
Major Projects
Learn more about Ecojustice Class Major Projects.
These projects last for two or more weeks. They typically requires more preparation by teachers, and may require funding to purchase equipment. Yet though these project require more work, they often prove to be what the teens remember most about the class.