Material on this page is copyright (c) 2016-2024 Dan Harper
Return to main Handwork page
Handwork for the Lively Arts includes those projects that are related in some way to one of the lively arts: drama, music, etc.
I/ Environments
Create environments into which the children can physically enter. Ideas for environments:
A. Child-sized house, or Playhouse
The old Haunting House curriculum (for ages 5-6) had the children build houses for themselves. These houses were big enough to climb inside of.
Another classic project is to make a playhouse that everyone can fit inside. A very large cardboard box (the size that refrigerators come in) can make a playhouse — or the class can tape together smaller cardboard boxes.
Related to making a playhouse is making a time machine. In the old “Travel in Time” curriculum for gr. 4-6, the children made a large time machine into which they could all fit. The children would decorate the time machine with various controls (flashing lights are optional). Then when the teachers want to read a story about something that happened in the past, everyone gets into the time machine, goes back to that era, and gets out again to listen to the story.
B. Tower of Babel with cardboard boxes
In this classic project (from the old Timeless Themes curriculum), you tell the children the story of the Tower of Babel. Next the children build a tall tower using cardboard boxes you’ve collected. Then comes the best part — the children get to knock down the tower, just as happens in the story.
C. Building a set, or making props for a play
If you use a curriculum where the children act out a story (such as the From Long Ago curriculum on this website), some groups of children may ask to put on a play for their parents. In that case, you may want to make props, costumes, and even set backgrounds for the play.
II/ Puppets
Puppets may be used in puppet shows, or with less formal puppet play.
A. Stick Puppets
Draw the puppet on stiff paper or light cardboard. Then cut out the puppet. Attach the puppet to a “tongue depressor” (large wood craft stick) using hot melt glue.
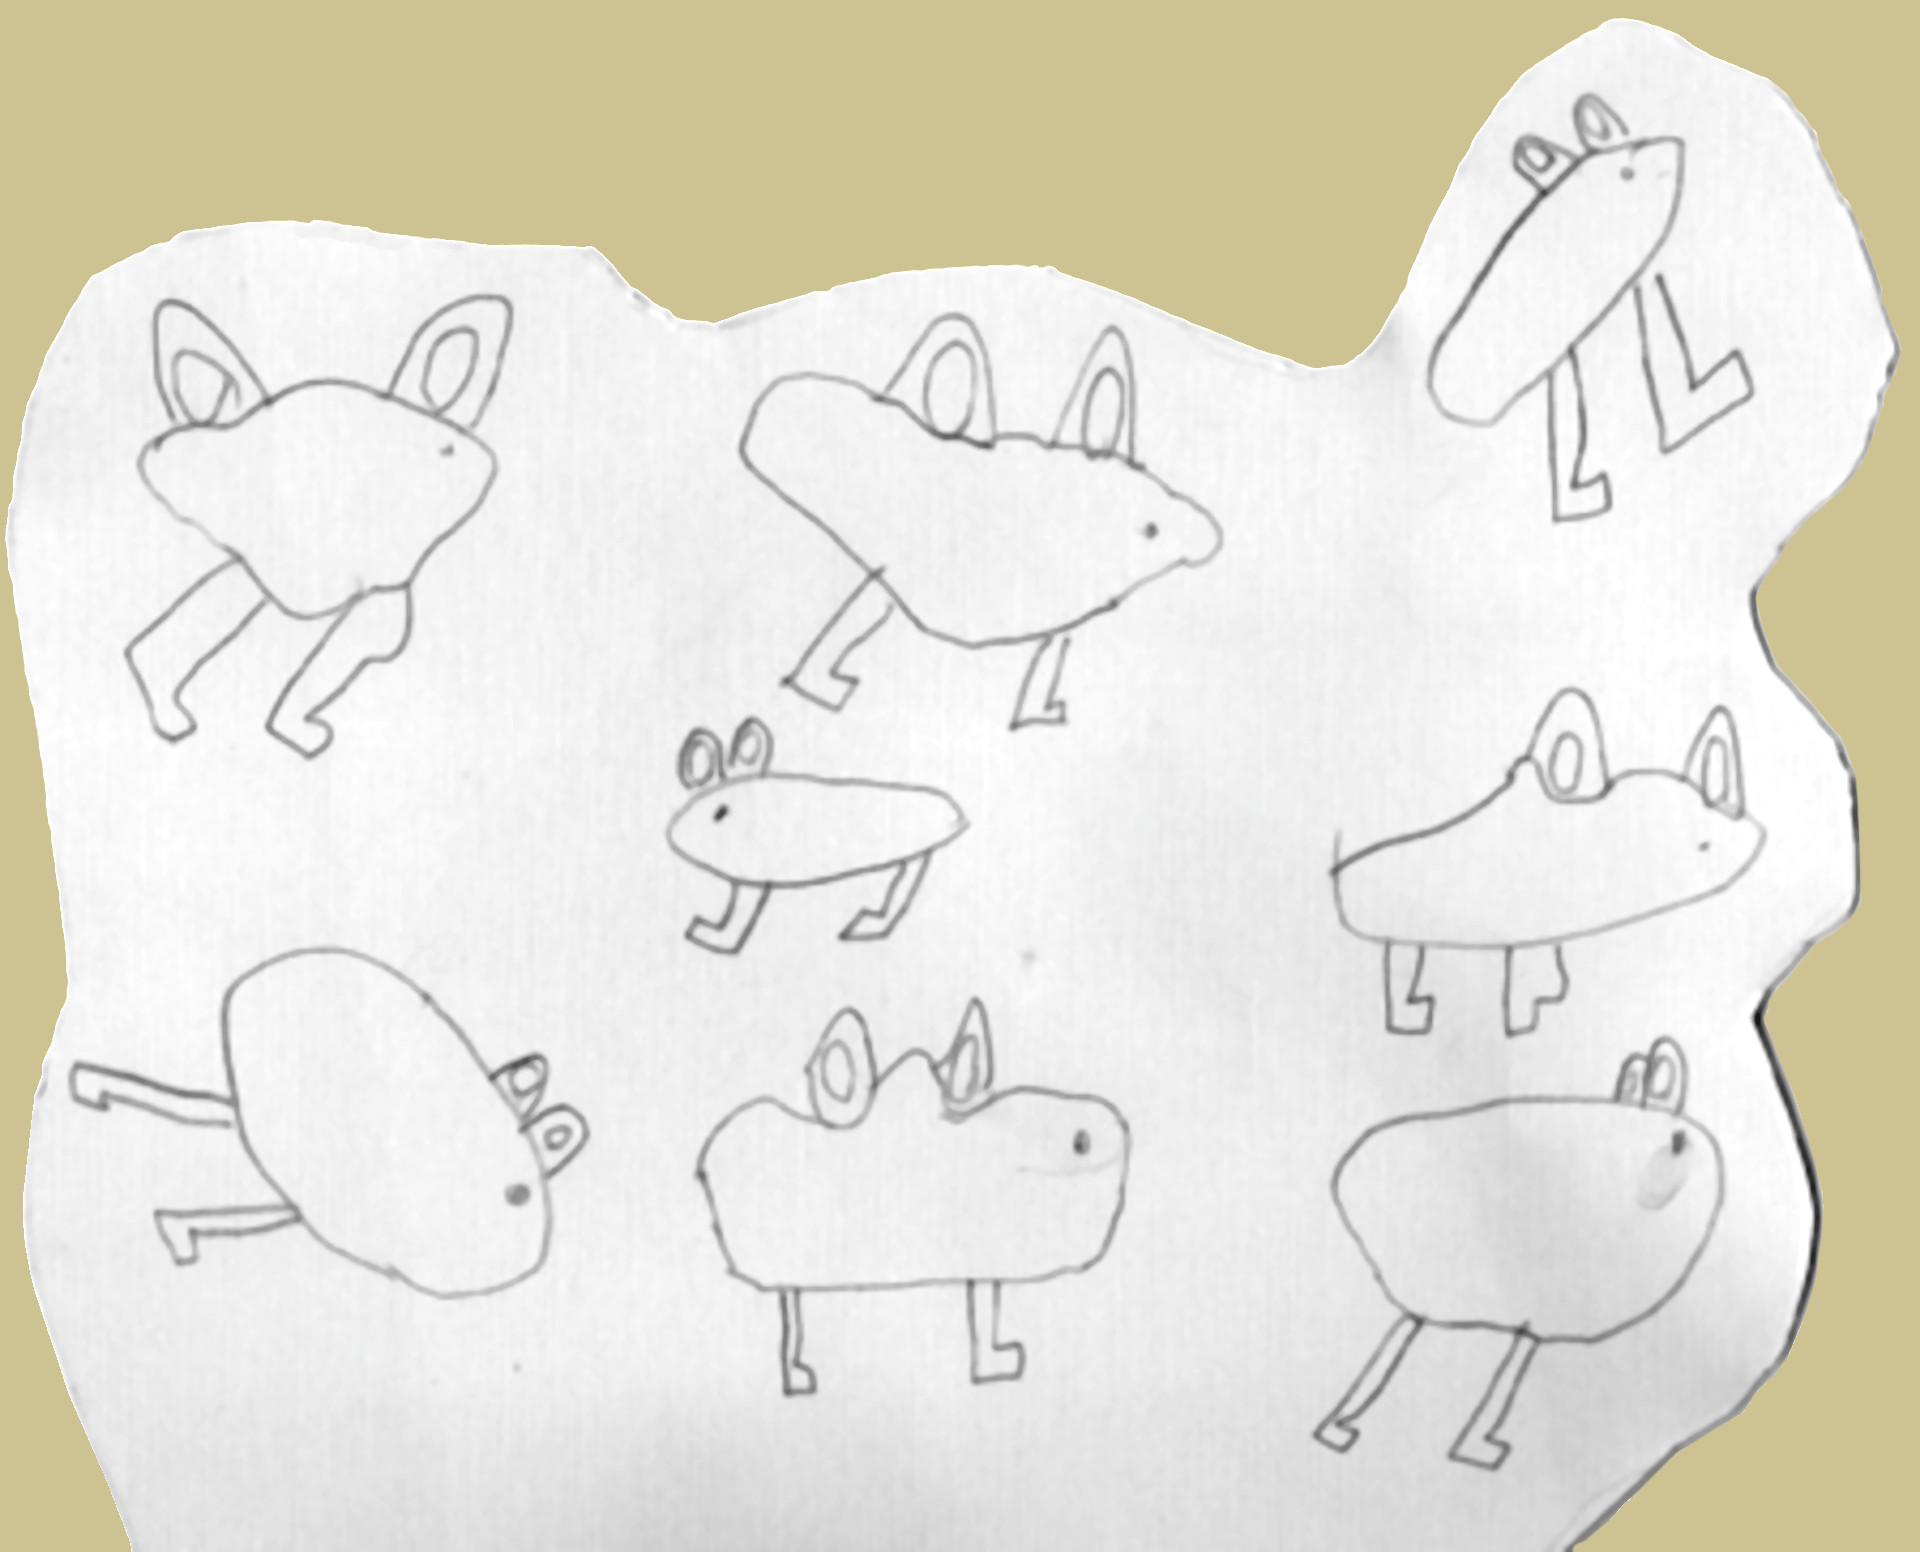
One seven-year-old child made a puppet of “hundreds of rabbits,” with more than one rabbit on the puppet. The rabbits were drawn in using a pencil, then the child cut out around the rabbits. The photo below shows the puppet; the stick supporting the puppet extended below the flat base of the puppet:
B. Paper bag puppets
This section provides patterns and instructions for making four paper bag puppet characters: a Tiger, a Lion, a Great Tree Spirit, and a Little Tree Spirit. These four characters can be used to act out the Jataka tale of The Little Tree Spirit.
Once you get the basic idea, it’s easy to make up other paper bag puppet characters.
Preparation
Print out the patterns for the paper bag hand puppets on card stock. Carefully cut along the lines, so the children can trace the outside of the card stock pattern. OR you can help the children draw the puppet pieces freehand.
Tree Spirit puppet patterns (PDF)
Assemble supplies:
glue sticks
scissors
pencils
black magic markers
paper bags (lunch bag size, 5 x 10 in. folded)
paper or card stock in the following colors:
—pink (for noses and mouths)
—white (for eyes)
—dull green (for Little Tree Spirit)
—bright green (for Great Tree Spirit)
—orange (for Tiger)
—yellow (for Lion’s head)
—brown (for Lion’s mane)
How to make the puppets
Let’s start by seeing how the Tiger puppet is made.
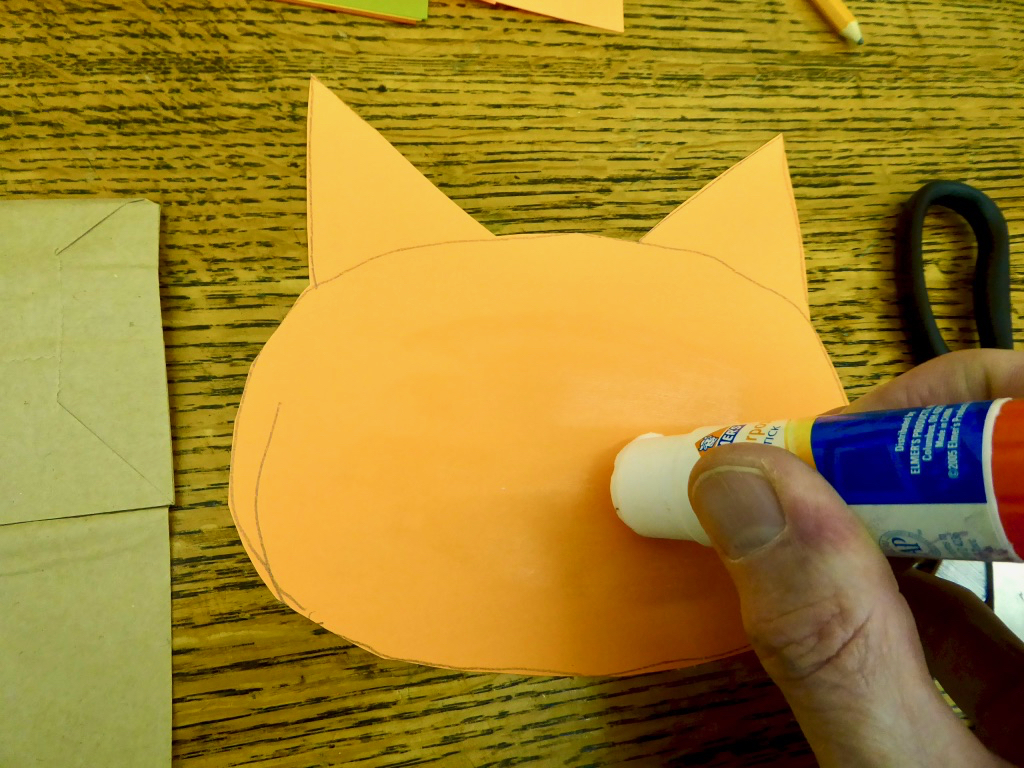
Step One:
Trace the head pattern onto a piece of orange paper, and cut out the head (it’s also fine to draw the head shape freehand on the paper, using the pattern as a guide to size and shape).
Then glue the head onto what is usually the bottom of the paper bag.
Step Two:
Using the patterns, trace and cut out two eyes from white paper (you can also trace around the cap to a glue stick). Trace and cut out one nose from pink paper. Glue the eyes and nose onto the head shape.
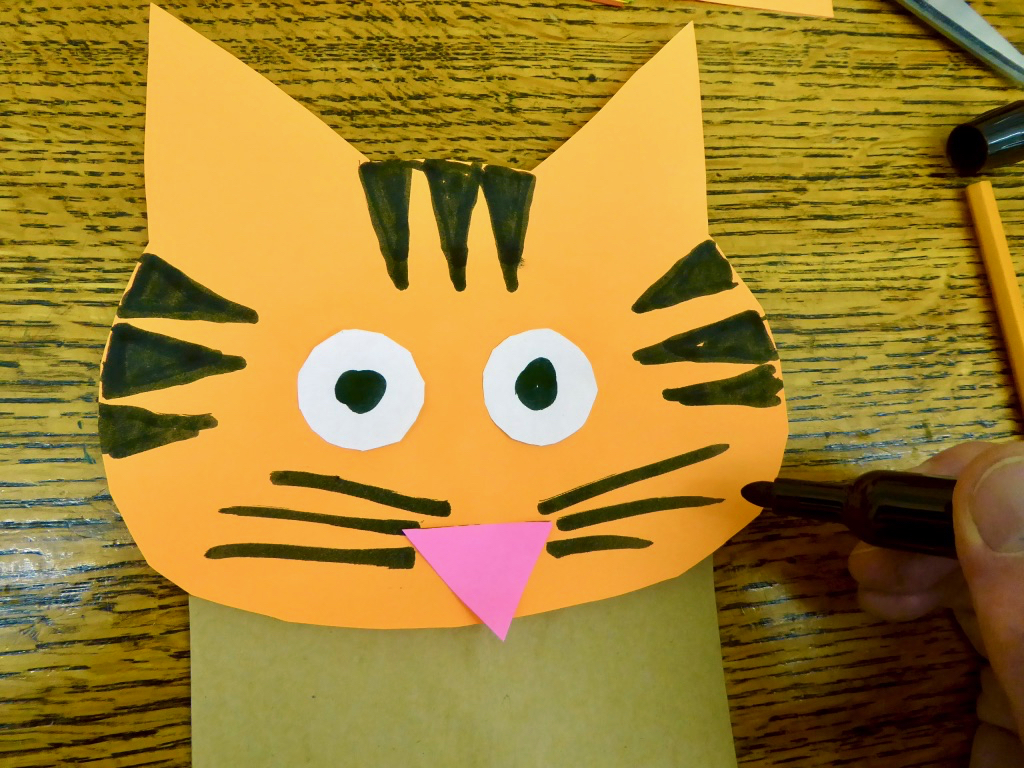
Use the black magic marker to draw pupils in the eyes, stripes on the head, and whiskers as shown:
Step Three:
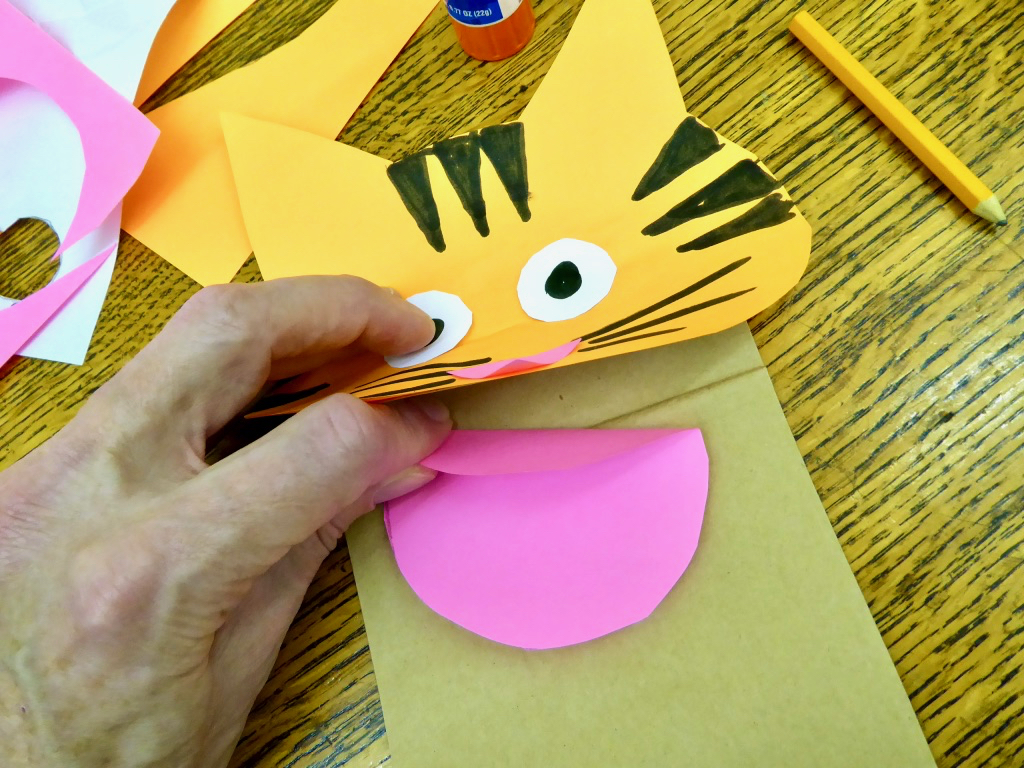
Trace and cut out the mouth shape from pink paper. Fold it about one third of the way across the diameter (about one inch from the edge). Then glue the mouth in the flap formed by the bottom of the paper bag where it’s folded over. You want a little bit of the pink mouth to show below the head of the puppet.
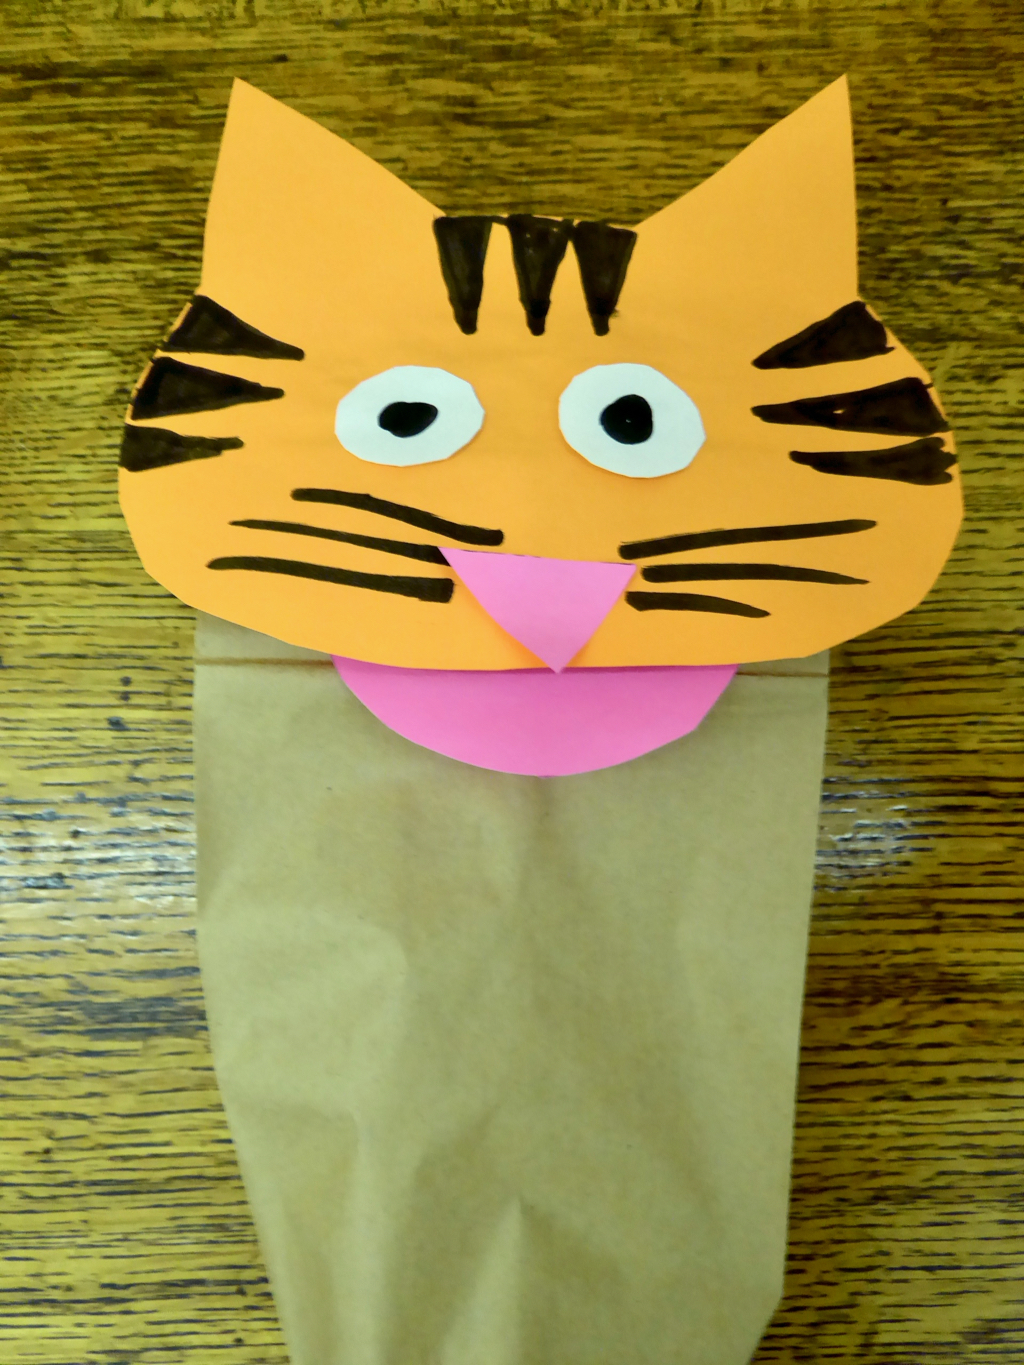
Here’s a photo of the completed puppet, with a hand inside:
The rest of the puppets are made in much the same way.
For the Lion: Use the same head pattern as for the Tiger, but cut the head out of yellow paper. Cut a mane out of brown paper and glue the head on the mane. Glue the head with its mane onto the paper bag. Glue on the eyes and draw in the pupils. Glue on the nose. Glue in the mouth.
For the Little Tree Spirit: Use the tree pattern and cut the tree out of green paper. Glue the tree shape onto the paper bag. Glue on the eyes and draw in the pupils. Glue in the mouth.
For the Great Tree Spirit: Use the mane pattern but cut the shape out of green paper. Glue the resulting large tree shape onto the paper bag. Glue on the eyes and draw in the pupils. Glue in the mouth.
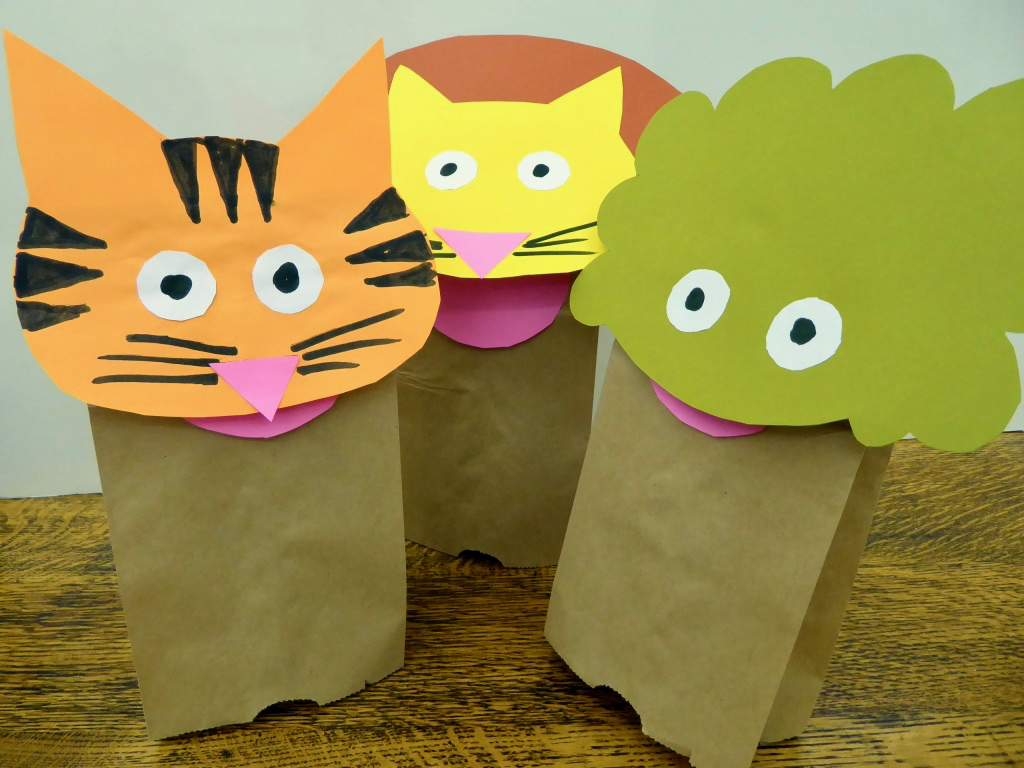
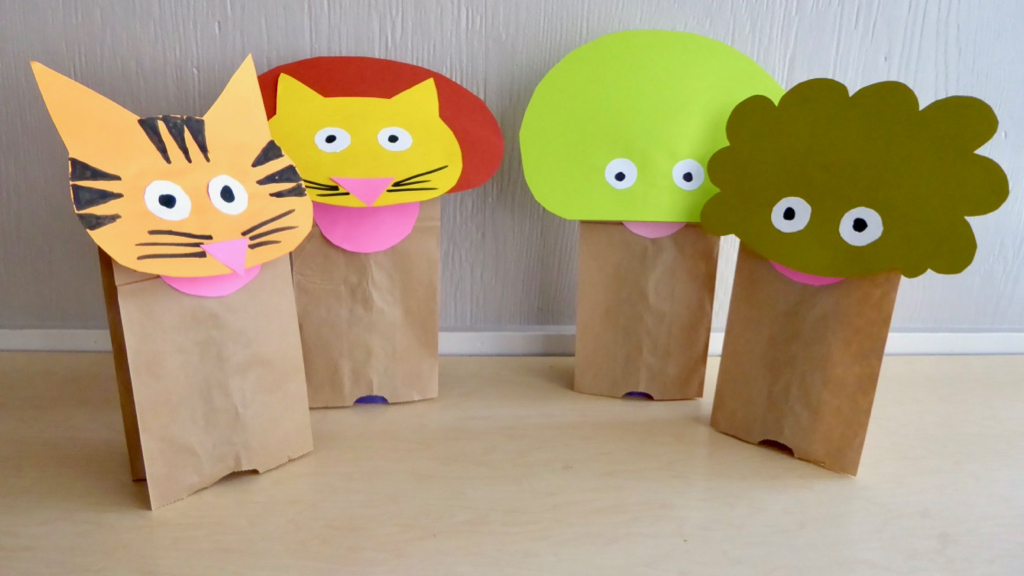
Here are the four completed puppets:
You can use the same eye and mouth patterns to make other puppet characters.
III/ Masks
Written instructions on how to make simple masks elsewhere on this website (as shown in the photos below).
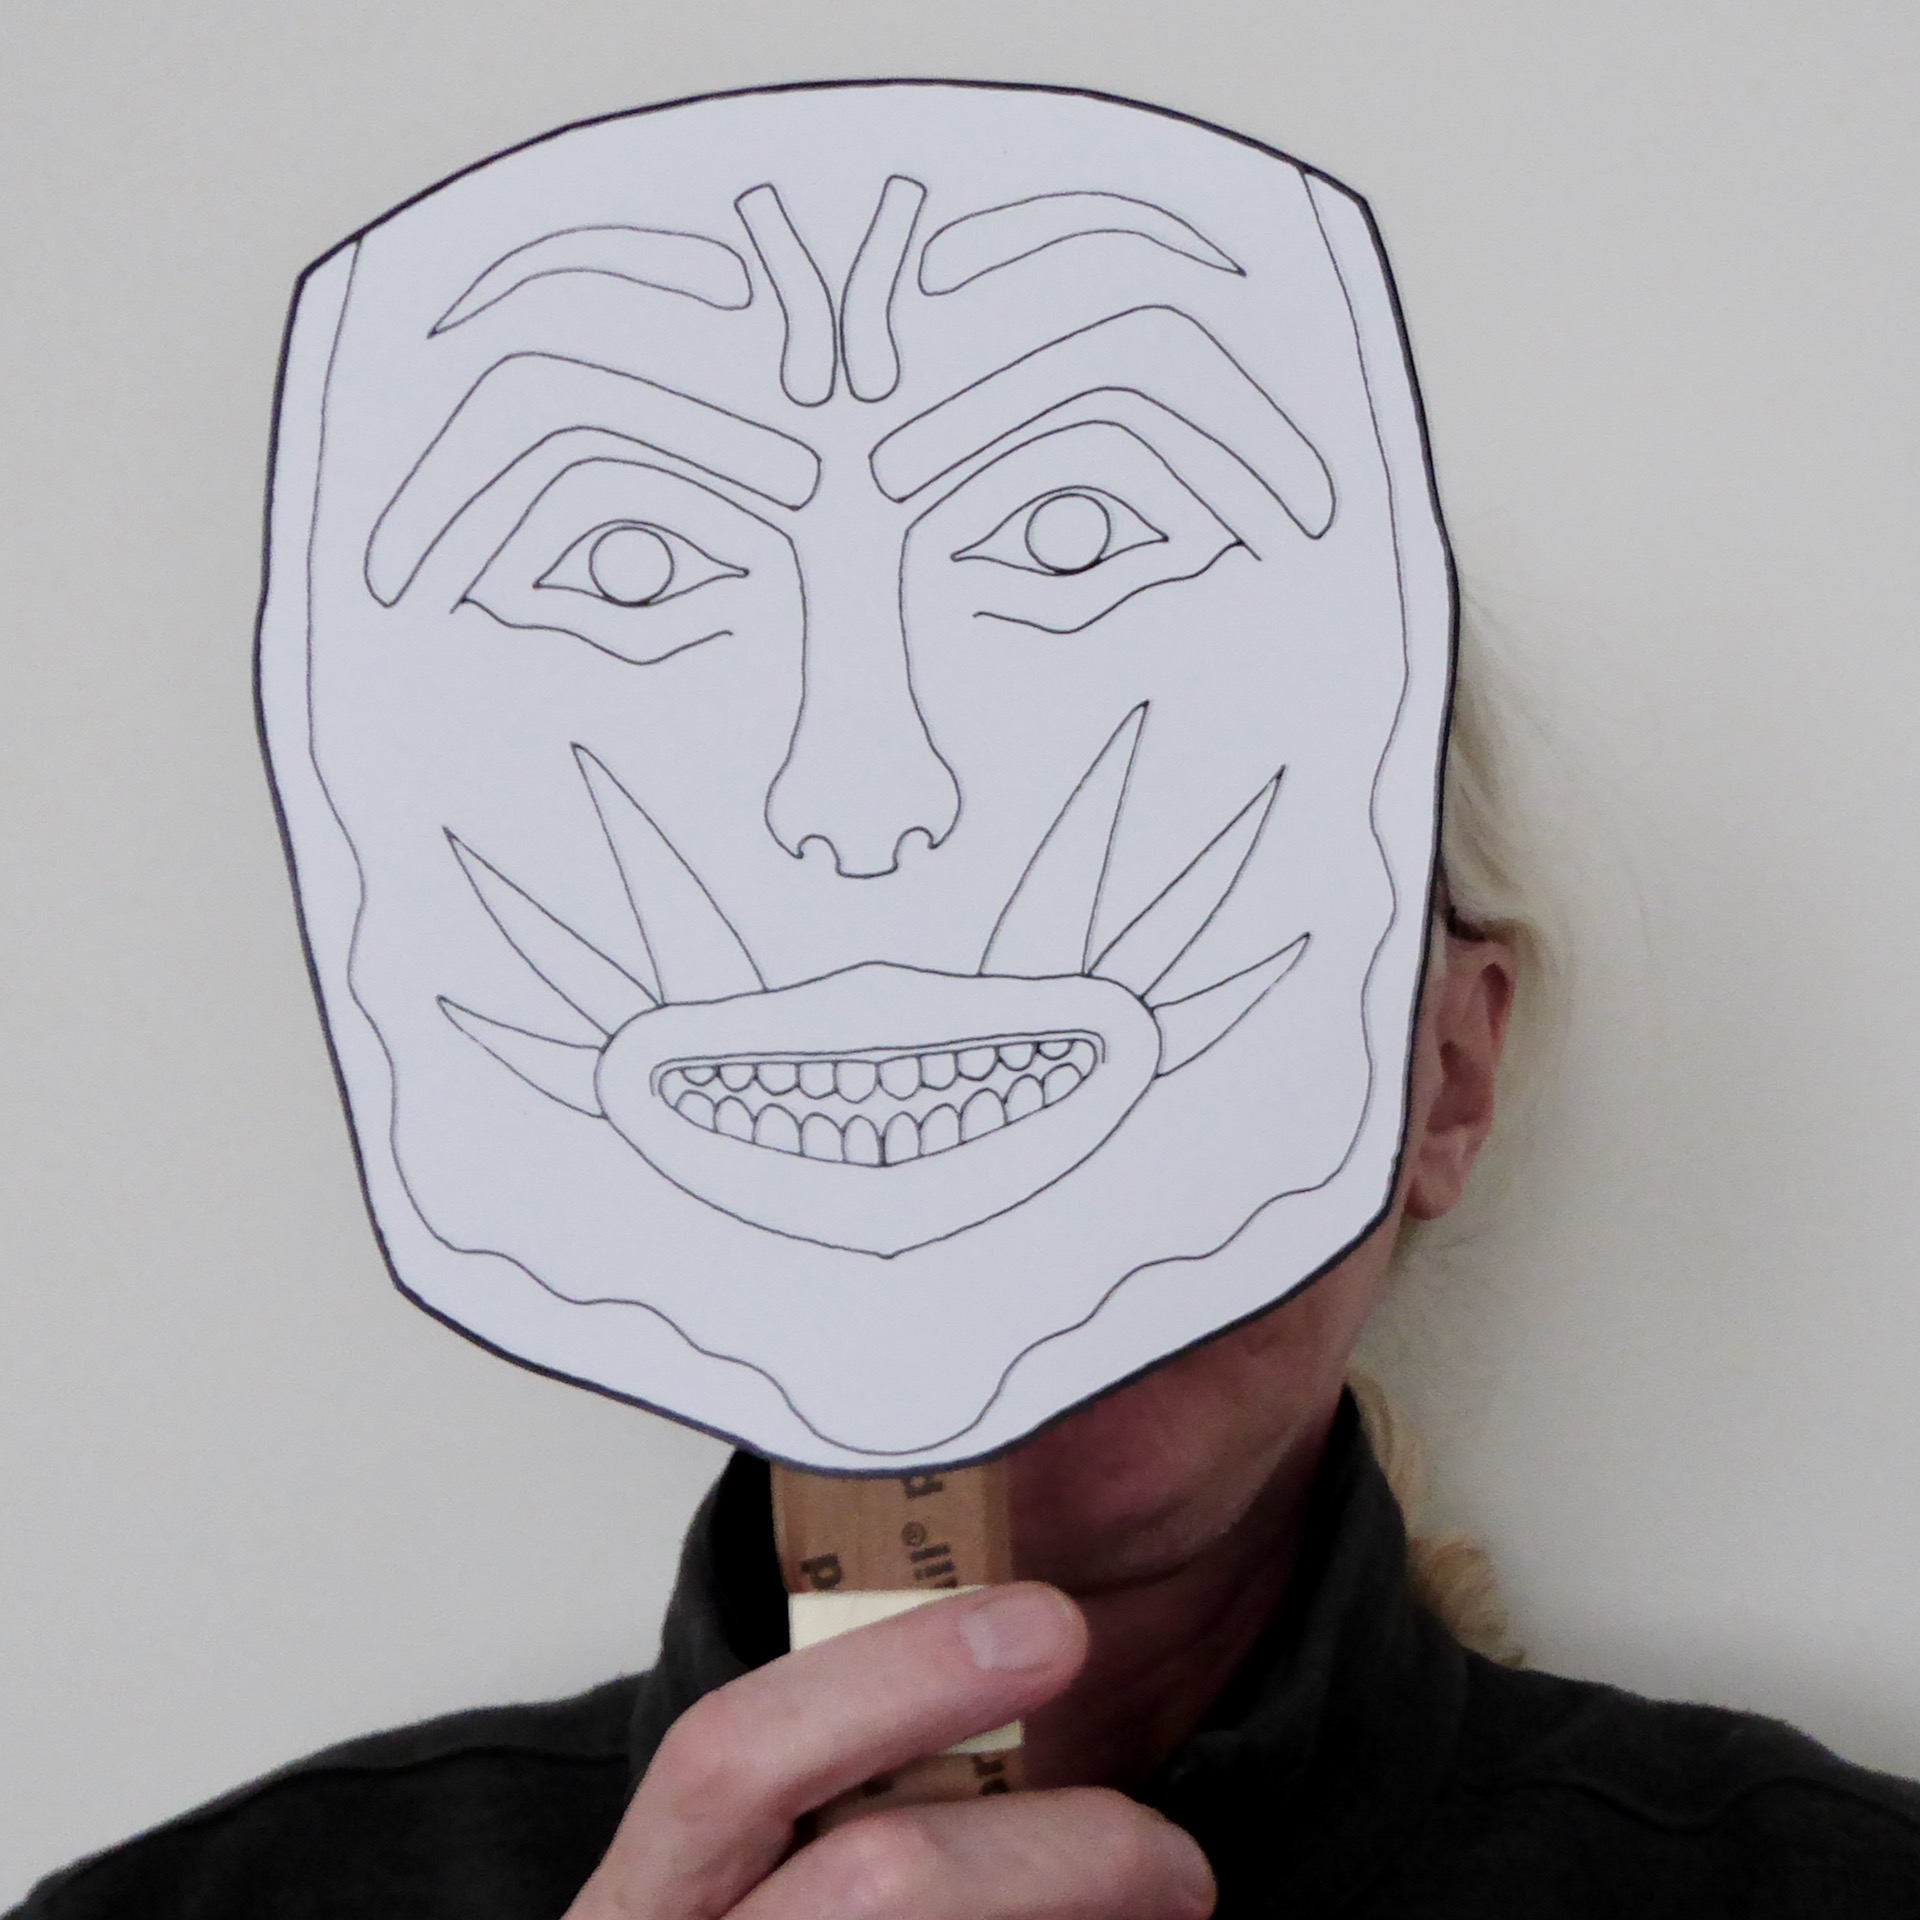
You can make a simple mask by drawing the mask on cardstock, cutting it out, then attaching a string to tie the mask on your face. The difficult part is figuring out where the eyeholes should be. The link above has templates you can use to make masks, with eyeholes about the right distance apart.

Instead of tying the mask on, you can also mount the mask on a stick, as shown below. Use a piece of folded corrugated cardboard to make the stick. You can tape the tick on the mask.